


Are you tired of spending a small fortune at nail salons, only to find your manicure chipped within days? If the answer is yes, you're in luck! This comprehensive guide will walk you through everything you need to know about achieving stunning nails right from the comfort of your own home. With a few simple tools, a dash of creativity, and a little bit of practice, you can transform your nails into a fabulous fashion statement. Let’s dive in and explore the art of self-manicure!


Understanding the Basics of a Manicure
Before we jump into the step-by-step process, it’s essential to understand what a manicure involves. A manicure is not just about painting your nails; it’s a complete treatment process that includes:
- Nail Shaping: Trimming and filing your nails to your preferred length and shape. This is crucial as it sets the foundation for your overall appearance.
- Cuticle Care: Pushing back and trimming excess cuticle skin. Healthy cuticles help prevent infections and contribute to the overall look of well-groomed nails.
- Exfoliation: Removing dead skin cells to keep your hands looking young and fresh. This step is often overlooked but is essential for achieving the perfect manicure.
- Moisturizing: Hydrating your hands and nails after all the treatment. Moisturized hands not only look better but also keep your nails strong.
- Nail Polish Application: Applying base coat, color, and top coat for a complete look that lasts.
Gathering Your Tools
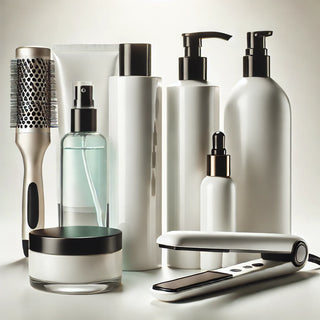
To get started with your manicure at home, you will need some essential tools. Here’s a comprehensive list of what you should gather:
- Nail clippers – for trimming nails to your desired length.
- Nail file – to shape your nails and smooth out edges.
- Cotton balls or pads – for nail polish remover and cleaning up any mess.
- Nail polish remover – to remove old polish before starting.
- Cuticle pusher – to gently push back cuticles.
- Cuticle nippers – for trimming excess cuticle skin (if necessary).
- Buffer – to create a smooth surface on your nails.
- Moisturizing lotion or cuticle oil – to hydrate your hands and nails.
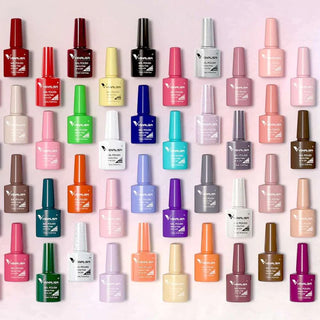
- Base coat, color polish, and top coat – for the final color and protection.
- Optional: nail art tools such as dotting tools, striping brushes, and nail tape if you want to get creative!
Step-by-Step Manicure at Home
Step 1: Prepare Your Nails
Start by removing any old nail polish with nail polish remover and a cotton ball. Be thorough, ensuring all remnants are removed for a smooth application. Once that’s done, wash your hands to eliminate any dirt or oils. This step is crucial as it ensures a clean slate for your manicure.
Step 2: Shape Your Nails
Using your nail clippers, cut your nails to your desired length. It’s best to cut straight across to avoid ingrown nails. Then, take your nail file and gently shape the edges. A round or square shape is classic, but feel free to experiment with different shapes like oval or almond depending on your preference! Remember, take your time to get the shape just right; it can make all the difference in the overall look.
Step 3: Care for Your Cuticles
Gently push back your cuticles with a cuticle pusher. Be careful—this is a delicate area, and you don’t want to damage your skin. If necessary, you can trim any excess cuticle skin using cuticle nippers, but be cautious not to overdo it. After this, apply a bit of cuticle oil to nourish and hydrate the area. This will keep your cuticles healthy and your nails looking neat.
Step 4: Buff Your Nails
Using a nail buffer, gently buff the surface of your nails. This step helps remove any ridges and creates a smooth base for your polish. Be careful not to buff too aggressively, as this can weaken your nails. A gentle touch will help create a healthy surface for color application and promote nail strength.
Step 5: Exfoliate Your Hands
Don’t forget about your hands! Use a gentle exfoliating scrub to remove dead skin cells. This step is essential for keeping your hands looking youthful and soft. You can use a store-bought scrub or create one at home using sugar and coconut oil. Rinse off the scrub and pat your hands dry. Enjoy the feeling of smooth, rejuvenated skin!
Step 6: Moisturize
Apply a generous amount of moisturizing lotion to your hands and massage it in thoroughly. Focus on the areas around your cuticles and nails, as this helps keep them looking hydrated and healthy. Optional: you can apply a thicker cream or cuticle oil for added hydration, particularly if your hands tend to get dry.
Step 7: Nail Polish Application
Now that your nails are prepped, it’s time for the fun part—applying nail polish! Start with a base coat to protect your nails and ensure the color adheres properly. Once the base coat is dry, apply two coats of your chosen color, allowing each coat to dry completely before applying the next. A good rule of thumb is to use thin layers to prevent bubbling and ensure a smoother finish. Finally, finish with a top coat for an extra layer of shine and to lock your color in.
Step 8: Clean Up
After applying the nail polish, use a small brush or a cotton swab dipped in nail polish remover to clean up any excess polish around the edges of your nails. This small detail makes a significant difference and gives you a polished, professional look.
Step 9: Let Them Dry
Now comes the waiting game! Allow your nails to dry completely. Try to avoid using your hands too much during this time. If you’re in a hurry, consider using a quick-dry top coat or a fan to speed up the drying process. Patience is critical here, as smudged polish can ruin the results of all your hard work.
Creative Nail Art Ideas
Feeling a bit adventurous? Once you’ve mastered the basics of manicure, it’s time to get creative! Here are some simple nail art ideas to elevate your look:
- Accent Nails: Choose one nail on each hand to paint in a contrasting color or add glitter. This simple technique can add a pop of fun to your manicure.
- Stripes: Use striping tape or a fine brush to create stripes for a chic look. Try vertical, horizontal, or diagonal stripes for different effects.
- Polka Dots: With the end of a bobby pin, create dots on an already painted nail for a playful design. Mix and match colors for a fun twist!
- Ombre Effect: Blend two colors together for a gradient look. You can use a makeup sponge to dab the colors onto your nails for a beautiful ombre effect.
- Glitter Gradient: Apply glitter from the tips of your nails toward the base for a sparkly gradient. This is perfect for special occasions!
- Floral Designs: Use a fine brush to paint small flowers or leaves on your nails for a fresh, springtime look.
Maintaining Your Stunning Manicure
Once you've completed your manicure, you'll want to keep it looking fresh for as long as possible. Here are some invaluable tips for maintaining your stunning nails:
- Avoid Water: Limit prolonged exposure to water, especially right after your manicure, as this can cause your polish to chip.
- Wear Gloves: Use rubber gloves when doing household chores to protect your nails from damage.
- Moisturize Regularly: Keep your nails and cuticles hydrated with cuticle oil or hand cream. This keeps your skin soft and your manicure looking fresh.
- Touch Up Chips: Carry a small bottle of your nail color to touch up any chips as needed. This can extend the life of your manicure significantly!
- Weekly Maintenance: Consider performing mini-maintenance on your nails weekly. This can include buffing, cuticle care, and a fresh top coat application.
Additional Tips for a Professional-Looking Manicure
To make your at-home manicure look even more salon-quality, consider the following additional tips:
- Invest in Quality Products: While you don’t need to break the bank, using good-quality nail polish, remover, and tools can make a significant difference in the finished product.
- Practice Makes Perfect: Don’t be discouraged if your first attempts don’t turn out perfectly. Like any skill, practice is essential for improvement!
- Stay Inspired: Follow nail art influencers on social media or browse through Pinterest for inspiration. New trends and techniques are always emerging!
- Watch Tutorials: YouTube has countless tutorials on nail art and manicure techniques that can help you refine your skills.
Final Thoughts
With a little patience and practice, a stunning manicure at home is entirely achievable! Not only will you save money, but you’ll also gain the satisfaction of knowing you did it yourself. So gather your tools, put on some music, and treat yourself to a self-care day. Beautiful nails are just a few steps away!
Now that you’re equipped with all the tips and tricks, it’s time to get started on your at-home manicure adventure. Remember, the key to stunning nails is regular care and practice. Happy pampering!
Make this experience even more enjoyable by treating it as a personal spa day. Light a candle, sip on your favorite drink, and engage with your creativity. You deserve it!