


There's something undeniably enchanting about having perfectly manicured nails. They can transform your look, boost your confidence, and convey a sense of self-care. However, frequent visits to the salon can be costly and time-consuming. Fear not! This guide will help you master the art of at-home manicure, ensuring your nails look flawless without breaking the bank. So grab your favorite polish and let’s dive into the world of nails!


1. Understanding the Basics of a Manicure
Before diving into the nitty-gritty of at-home manicure techniques, it’s essential to understand what a manicure entails. A manicure is primarily the cosmetic treatment of the hands and fingernails, which includes cleaning, shaping, buffing, and polishing. The process can vary from simple nail care to elaborate nail art. Understanding these fundamentals can set the foundation for your incredible at-home manicure journey.
2. Gather Your Essential Tools
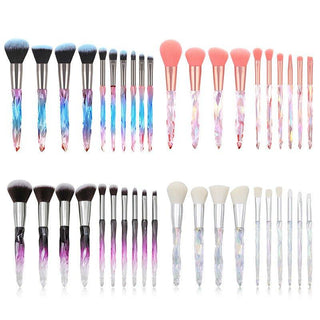
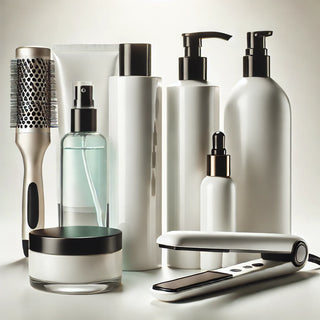
For a successful at-home manicure, having the right tools is crucial. Here’s a comprehensive list of essential items you’ll need:
- Nail clippers
- Nail file (preferably glass or ceramic)
- Cuticle pusher or nippers
- Cotton balls or pads
- Acetone-free nail polish remover
- Buffer block
- Moisturizing hand cream or lotion
- Nail polish (base coat, color, and top coat)
- Nail art tools (brushes, dotting tools, and stickers for creative designs)
- Nail strengthener (optional but recommended)
Having these tools on hand will make your manicure process smoother and more enjoyable, allowing you to achieve that salon-quality finish from the comfort of your home.
3. Preparing Your Nails for Manicure
Preparation is key! Properly preparing your nails sets the stage for a flawless manicure. Follow these steps:
- Remove Old Polish: Use an acetone-free nail polish remover to gently wipe off any old polish. This helps you start fresh and ensures the new polish adheres well to your nails.
- Soak Your Hands: Soak your nails in warm, soapy water for about 5-10 minutes. This not only helps in softening your cuticles but also relaxes your hands, making the entire process more enjoyable.
- Trim and Shape: Use nail clippers to trim your nails to your desired length. Then, use a nail file to shape them into your preferred style, whether it’s square, round, or oval. Keep in mind: filing in one direction helps prevent splitting and promotes healthier nails.
4. Caring for Your Cuticles
Your cuticles play a protective role for your nails, so it's important to treat them gently. After soaking, use a cuticle pusher to gently push back your cuticles, following their natural shape. If necessary, you can trim any excess cuticle with cuticle scissors, but be cautious not to cut too much as this can lead to infections.
Applying a high-quality cuticle oil or cream afterward can nourish and hydrate your cuticles, promoting healthy nail growth and improving the overall appearance of your hands.
5. Buffing Your Nails
This step is often overlooked but is vital for achieving a long-lasting and shiny manicure. Use a buffer block to smooth the surface of your nails, which allows the polish to apply more evenly. Buff gently to avoid damaging the nail. Even a light buff can make a significant difference in how your polish adheres and lasts.
6. Moisturizing Your Hands
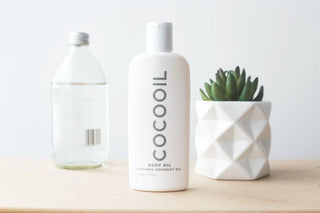
After filing and buffing, give your hands some much-deserved TLC. Apply a generous amount of moisturizing hand cream and massage it into your hands and nails. This step not only keeps your skin soft but also enhances the overall appearance of your manicure. You can opt for creams with nourishing ingredients like shea butter or coconut oil for added benefits.
7. The Painting Process
Now comes the fun part: applying your nail polish! Follow these steps for a perfect polish application:
- Base Coat: Start by applying a base coat to your nails. This primer layer protects your nails from staining and provides a smooth surface for the color. Allow it to dry completely before moving to the next step.
- Color Coat: Once the base coat is dry, apply your chosen nail polish color. Start with three strokes: one down the center and one along each side. This technique ensures even coverage. Depending on the polish’s opacity, you may need two to three coats. Allow each coat to dry thoroughly before applying the next.
- Top Coat: After your color has dried, finish with a top coat. This adds shine, helps your manicure last longer, and prevents chipping. Apply it carefully and don’t forget to seal the edge of your nails for better durability.
8. Nail Art: Add Your Personal Touch
If you're feeling a bit adventurous, consider adding some nail art to your manicure. Nail art can be as simple or intricate as you’d like. Use nail art brushes or stickers for designs, or try techniques like sponging or marbling to create unique effects. You can even explore geometric patterns, florals, or seasonal themes!
Don’t be afraid to experiment and express your creativity! There are countless tutorials available online that can teach you various nail art techniques, from dots and stripes to intricate designs that will have your friends asking where you got your nails done.
9. Final Touches and Drying
After painting, give your nails some time to dry. To speed up the process, you can use a quick-dry top coat or even dip your fingers in cold water. Avoid smudging by being patient; it’s worth the wait for that flawless finish! To minimize the risk of smudging, consider keeping your hands still and avoiding contact with anything for at least 15 minutes after your final coat.
10. Maintenance: Keeping Your Manicure Fresh
Your freshly painted nails need some love to keep them looking their best. Here are some tips for maintaining your manicure:
- Apply a clear top coat every few days to protect your polish and add shine.
- Avoid using your nails as tools, as this can lead to chips and breaks.
- Moisturize your hands regularly to keep your skin and cuticles hydrated. Keep a small tube of hand cream in your bag for on-the-go hydration.
- If a chip occurs, don’t fret! Use a small brush to fill in the chipped area with your polish and apply a top coat to blend it.
Additionally, consider using a nail strengthener if you notice your nails are weak or prone to breakage. This extra step can fortify your nails, giving you a more durable manicure.
11. Removing Your Manicure Safely
When it’s time to remove your polish, do so gently to avoid damaging your nails:
- Soak a cotton ball or pad with acetone-free nail polish remover.
- Press it onto your nail and hold it there for a few seconds to let the remover soak in, which will help break down the polish.
- Wipe gently until the polish comes off. If needed, repeat the process for any stubborn areas. Be sure to wash your hands afterward to remove any residue from the remover.
12. Addressing Common Nail Concerns
Sometimes, your nails may face challenges such as splitting, peeling, or brittleness. Here are a few tips to address these common issues:
- Splitting: To manage splitting, avoid using your nails as tools and keep them trimmed to a manageable length. Use a strengthening polish or treatment to help reinforce your nails.
- Peeling: Peeling can be a sign of dehydration. Ensure you’re moisturizing your nails and cuticles regularly, and consider using a hydrating nail treatment.
- Brittleness: Brittle nails can benefit from a nourishing oil or treatment that infuses moisture, such as those containing vitamin E or jojoba oil.
Conclusion
Congratulations! You've now mastered the knowledge to create a beautiful manicure at home. By following these comprehensive steps and investing a little time into your nail care routine, you can enjoy salon-worthy nails without ever leaving your house. Remember, practice makes perfect, so don’t hesitate to try new techniques and colors. Embrace your creativity and let your nails reflect your unique personality!
With just a little effort and the right techniques, you can create stunning manicures that not only look amazing but also contribute to your overall well-being. So, gather your tools, get comfortable, and start your journey toward flawless nails at home! Enjoy the process, and remember that the best part of this self-care ritual is the joy it brings you.