

Cutting hair isn't just about snipping away at strands; it's an art. Especially for men, getting the right style can make a huge difference in how they feel and present themselves. Whether you're a barber or just looking to improve your skills at home, understanding the basics and some advanced techniques can help you achieve great results. This guide covers essential tips and tricks to master the art of hair style cutting for men.
Key Takeaways
- Understanding hair cutting basics like elevation and over-direction is key.
- Layering is a great way to add volume and dimension to men's hairstyles.
- Face-framing techniques can enhance a man's features dramatically.
- Mastering the shag haircut can give a trendy, effortless look.
- Using the right tools is crucial for achieving a clean and professional finish.
Understanding Hair Cutting Techniques
Alright, let's talk about the basics. You can't build a house without a solid foundation, and you can't create awesome hairstyles without understanding the core techniques of hair cutting. It's more than just chopping off hair; it's about understanding how each snip affects the overall shape and style. This section will cover some key concepts that will help you level up your hair cutting game. It's like learning the alphabet before writing a novel – you gotta know the rules to break them effectively.
The Importance of Elevation
Elevation is all about the angle at which you hold the hair away from the head while cutting. It's a game-changer for creating layers and adding volume. Think of it like this: the higher the elevation, the more layers you'll create. But be careful! Too much elevation can lead to a choppy, uneven look. It's a balancing act. For a more blended, subtle effect, stick to lower elevations. Understanding elevation is key to controlling the vertical movement of hair.
Mastering Over-Direction
Over-direction refers to pulling the hair away from its natural fall line before cutting. This technique is super useful for creating length and weight distribution. If you want to maintain length in the front while adding volume in the back, over-direct the hair backward before cutting. Conversely, over-directing forward can create a cool, edgy, asymmetrical look. It's all about manipulating the hair's horizontal movement to achieve the desired shape. It's also great for fixing a cut that was over layered previously.
Utilizing Finger Angles
Finger angle is the angle at which you hold your fingers (and therefore the hair) while cutting. This technique is crucial for creating depth and texture within a haircut. Cutting with a diagonal finger angle, for example, can soften the lines of a blunt cut and add movement. Experiment with different angles to see how they affect the final result. It's a subtle technique, but it can make a big difference in the overall look. It's about creating depth within a haircut.
Think of finger angles as your secret weapon for customizing haircuts. A slight change in angle can dramatically alter the shape and texture of the hair. Don't be afraid to experiment and find what works best for different hair types and styles.
Here's a quick breakdown of how finger angles can affect the cut:
- Parallel: Creates a blunt, even line.
- Diagonal: Softens the line and adds movement.
- Concave: Removes weight and creates a rounded shape.
- Convex: Adds weight and creates a stronger line.
Layering Techniques for Men
Creating Depth with Layers
Layering is a game-changer when it comes to adding dimension and movement to men's hairstyles. It's not just about chopping off hair; it's about strategically removing weight to create a more dynamic look. The key is to understand how different layering techniques affect the overall shape and texture. Think of it like sculpting – you're shaping the hair to enhance its natural flow and create visual interest.
- Consider the hair's natural texture. Fine hair benefits from subtle layers to add volume, while thick hair can handle more aggressive layering to remove bulk.
- Pay attention to the client's head shape. Layers can be used to balance features and create a more flattering silhouette.
- Don't be afraid to experiment with different layering patterns. There's no one-size-fits-all approach.
Layering can really transform a haircut. I remember this one time, I gave a client a simple layered cut, and he came back a few weeks later saying it was the best haircut he'd ever had. It just goes to show how much of a difference the right technique can make.
Horizontal vs. Vertical Layering
Horizontal and vertical layering offer distinct results, and knowing when to use each is crucial. Horizontal layers tend to create a more uniform, blended effect, while vertical layers produce a choppier, more textured look. It really depends on the desired outcome. For example, horizontal layering is great for adding subtle volume and movement, while vertical layering is ideal for creating a more edgy, modern style. Understanding the difference between layering techniques is key to achieving the desired look.
- Horizontal Layering: Creates a softer, more blended effect. Ideal for adding subtle volume and movement.
- Vertical Layering: Produces a choppier, more textured look. Great for creating edgy, modern styles.
- Diagonal Layering: A hybrid approach that combines the benefits of both horizontal and vertical layering. Offers a balance of volume and texture.
Layering for Different Hair Types
Not all hair is created equal, and layering techniques need to be adapted to suit different hair types. Fine hair requires a delicate touch to avoid creating a wispy or sparse look. Thick hair, on the other hand, can handle more aggressive layering to remove weight and create shape. Curly hair presents its own unique challenges, as layers can either enhance or disrupt the natural curl pattern. Here's a quick guide:
| Hair Type | Layering Approach | Considerations |
|---|---|---|
| Fine Hair | Subtle, face-framing layers | Avoid over-layering, use texturizing products sparingly |
| Thick Hair | More aggressive layering | Focus on removing weight, consider using thinning shears |
| Curly Hair | Gradual, strategic layers | Work with the natural curl pattern, avoid creating frizz |
Face-Framing Techniques

Face-framing is all about accentuating a man's best features. It's not just about cutting hair; it's about sculpting a look that complements the face shape and brings out his personality. I've seen so many guys walk out of the salon looking like a million bucks simply because their hair now works with their face, not against it. It's a game-changer.
How to Frame the Face Effectively
Okay, so how do you actually do it? It starts with understanding the face shape. Is it round, square, oval, or heart-shaped? Each shape benefits from different techniques. For example, a round face might need some added height on top to create the illusion of length, while a square face might benefit from softer edges around the forehead and jawline. The key is to create balance and proportion.
Here's a simple breakdown:
- Oval Faces: Pretty versatile; most styles work well. Experiment with different lengths and textures.
- Round Faces: Add height and avoid width at the cheeks. Asymmetrical styles are your friend.
- Square Faces: Soften the angles with layers and texture. Avoid blunt, harsh lines.
- Heart-Shaped Faces: Add volume at the jawline to balance the wider forehead. Chin-length styles work great.
I remember one time, a client came in with a super round face and wanted a buzzcut. I gently steered him towards a style with some height on top and shorter sides. He was hesitant at first, but when he saw the final result, he was blown away. It completely transformed his look.
Choosing the Right Length
Length is a big factor. Too short, and you might expose features you want to downplay. Too long, and you might drag the face down. The ideal length should complement the face shape and highlight the best features. For instance, if a guy has strong cheekbones, a shorter style that accentuates them can be a great choice. Conversely, if he has a weaker jawline, a bit more length around the chin can help create a more defined look.
Consider these points when deciding on length:
- Hair Texture: Fine hair might look limp if it's too long, while thick hair can handle more length.
- Lifestyle: A low-maintenance guy might prefer a shorter, easier-to-style length.
- Personal Style: Does he want a classic, clean-cut look or something more edgy and modern?
Incorporating Bangs into Styles
Bangs aren't just for women! For men, strategically placed bangs can add a lot of character and style. They can soften a strong forehead, add texture, or even create a more youthful appearance. The trick is to choose the right type of bangs and style them correctly. A side-swept fringe can work wonders for softening a square face, while textured, choppy bangs can add a cool, effortless vibe. Just make sure they're not too heavy or overwhelming – the goal is to enhance, not hide, the face.
Here are a few bang styles to consider:
- Side-Swept Bangs: Versatile and flattering for most face shapes.
- Textured Bangs: Add a cool, modern edge.
- Choppy Bangs: Create a more casual, effortless look.
Mastering the Shag Haircut
Okay, so the shag haircut is back, and it's not going anywhere anytime soon. It's all about that effortless, cool vibe, but getting it right takes some know-how. It's not just about hacking away at the hair; there's a method to the madness. Let's break down how to nail this look.
Key Elements of a Shag Cut
First things first, you gotta understand what makes a shag a shag. It's all about the layers, baby! We're talking lots of choppy layers, especially around the crown, to give that volume and movement. The key is to create a disconnected look, where the layers don't blend seamlessly, giving it that intentionally messy feel. Think rockstar, not prom queen. Also, consider the face shape. A good shag complements the face, highlighting the best features. It's not a one-size-fits-all kind of deal.
- Choppy layers for volume
- Disconnected texture
- Face-framing shape
Texturizing Techniques
Texturizing is where the magic happens. There are a bunch of ways to add texture, and it really depends on the hair type and the look you're going for. Point cutting is great for softening the ends, while slide cutting can create more dramatic, piece-y sections. Razors can also be used, but be careful – they can create frizz on some hair types. Experiment and see what works best. Don't be afraid to try different layering techniques to achieve the desired effect.
- Point cutting
- Slide cutting
- Razor cutting (with caution)
Styling Tips for a Shag Look
Styling a shag is all about enhancing the natural texture. Forget about perfectly smooth blowouts; we're going for undone and effortless. Sea salt spray is your best friend for adding grit and definition. Diffusing can help bring out natural waves and curls, while air-drying is perfect for a more relaxed look. If you want more volume, try flipping your head upside down while drying. And don't be afraid to use your fingers to mess it up a bit – the more imperfect, the better. For a modern shag haircut, consider using a texturizing product to enhance the choppy layers.
The best thing about a shag is that it's supposed to look a little messy. Don't overthink it! Embrace the imperfections, and let the hair do its thing. It's all about confidence and owning that rockstar vibe.
Here's a quick guide on product use:
| Product | Purpose |
|---|---|
| Sea Salt Spray | Adds texture and definition |
| Texturizing Spray | Enhances choppy layers and volume |
| Mousse | Provides hold and body |
| Dry Shampoo | Absorbs oil and adds volume at the roots |
Achieving Precision in Haircuts
The Role of Tension in Cutting
Tension is super important when you're cutting hair. Too much, and you'll end up with a cut that's way shorter than you planned. Not enough, and you'll miss hairs, leading to an uneven look. The goal is to find that sweet spot – enough tension to guide the hair, but not so much that you're distorting its natural fall.
Think of it like this:
- Low tension: For soft, natural layers.
- Medium tension: For general, even cuts.
- High tension: Usually avoided, but can be used for very specific, structured styles.
It's best to use a comb to control the hair, putting less stress on it. This makes it easier to keep the hair in its true natural fall position. Also, bring the shears in and cut at the bottom edge of the guideline rather than on top to make sure the next section that comes down isn’t above your previously cut section.
Cross-Checking for Accuracy
Okay, you've made your cuts. Now what? Cross-checking is how you make sure everything is even. Basically, you part the hair in the opposite direction from how you cut it and look for any inconsistencies. If you see longer strands sticking out, carefully trim them. This step is a must for a perfect cut.
Here's a simple way to do it:
- Cut the initial section.
- Part the hair perpendicular to the cut.
- Trim any stray hairs.
Maintaining Consistent Lengths
Keeping lengths consistent is where the real skill comes in. It's all about using guides and paying attention to your angles. If you're doing a one-length cut, make sure you're holding the hair at the same elevation throughout. For layers, be mindful of how much you're elevating each section. Sharp professional-grade scissors are crucial for precision cutting and blending.
To help maintain consistent lengths, consider these points:
- Use a guide: Always have a section of previously cut hair to measure against.
- Check your posture: Make sure you're standing straight and not leaning, which can affect your cutting angle.
- Take your time: Rushing leads to mistakes. Focus on each section individually.
Creating a Messy, Stylish Look

Okay, so you want that cool, effortless vibe? It's totally achievable. The key is to start with the right cut and then use the right products to enhance what you've already got. It's all about looking like you didn't try too hard, even though you definitely did.
Foundation Cuts for Messy Styles
The foundation cut is super important for a messy look. Think layers, texture, and movement. A blunt, one-length cut is going to be way harder to style into that cool, undone look we're going for. Consider these options:
- Choppy Layers: These add instant texture and volume. They work great for most hair types.
- Disconnected Layers: These are more dramatic and create a more edgy, piece-y look. If you want something bold, this is it.
- Textured Ends: Point cutting or razor cutting the ends will soften the lines and make the hair easier to style into a messy look. This is a great way to add volume to fine hair.
Using Texturizing Products
Products are your best friend when it comes to achieving that perfect messy look. But don't overdo it! The goal is to enhance the natural texture, not create a helmet head. Here's a breakdown:
- Sea Salt Spray: This is a classic for a reason. It adds grit and texture, giving the hair that beachy, tousled look. Spray it on damp hair and scrunch.
- Texture Paste/Clay: These are great for adding definition and hold. Warm a small amount in your hands and work it through the hair, focusing on the ends.
- Dry Shampoo: Not just for dirty hair! Dry shampoo can add volume and texture to clean hair, making it easier to style. Plus, it soaks up any excess oil.
Finishing Techniques for a Casual Look
It's all in the details. Here's how to finish off your messy masterpiece:
- Tousle and Rake: Use your fingers to tousle the hair and create a natural, undone look. Rake your fingers through the hair to separate the strands and add definition.
- Air Dry or Diffuse: Avoid blow-drying with a brush, as this will create a smoother, more polished look. Air drying is ideal, but if you're short on time, use a diffuser on low heat to enhance the natural texture. You can also use a diffuser and a crinkling effect to coax out the texture.
- Strategic Placement: Pay attention to how the hair falls around your face. You might want to pull out a few strands to frame the face or create a more asymmetrical look. Remember, it's supposed to look effortless, so don't overthink it!
The key to a great messy look is confidence. Don't be afraid to experiment and find what works best for your hair type and personal style. It's all about embracing imperfection and having fun with it. If you want to tailor your haircut to your liking, you can refine it immediately rather than waiting for a salon appointment.
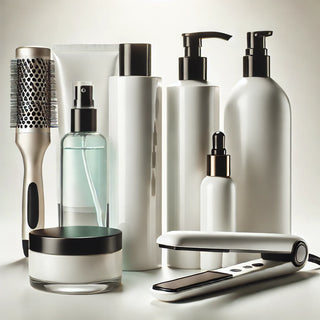
Essential Tools for Hair Style Cutting
Choosing the Right Shears
Okay, so you want to get serious about cutting hair? First things first: you absolutely need good shears. Not the ones you use for paper! A quality pair of shears is the foundation of any good haircut. Think of them as an investment. You want something that feels good in your hand, is sharp, and will last. Don't skimp here; it'll make a huge difference in the final result. Look for shears made from Japanese or German steel – they tend to hold an edge longer. Ergonomics matter too; make sure they're comfortable to hold for extended periods to avoid hand fatigue.
Understanding Clippers and Trimmers
Clippers and trimmers are your best friends for fades, buzz cuts, and cleaning up necklines. Clippers are for larger areas, while trimmers are for detail work. When choosing clippers, pay attention to the motor. A powerful motor will cut through thick hair without snagging. Adjustable guards are a must for creating different lengths and fades. Trimmers are smaller and designed for edging and outlining. Cordless options offer more flexibility, but make sure they have a decent battery life. A reliable set of clippers is a must-have.
Investing in Quality Combs and Brushes
Don't underestimate the power of a good comb or brush! They're not just for detangling; they're essential for sectioning hair, creating even cuts, and styling. Here's a quick rundown:
- Fine-tooth comb: Perfect for creating clean parts and distributing tension evenly while cutting.
- Wide-tooth comb: Great for detangling and working with thicker hair.
- Styling brush: Use for shaping and finishing styles.
A good comb helps to section the hair accurately, making the trimming process more manageable. A quality brush helps to style the hair after the cut, ensuring a polished look. These tools are often overlooked, but they are essential for achieving professional results.
Consider investing in a few different types to cover all your bases. A fine-tooth comb is essential for precision.
When it comes to cutting hair, having the right tools is super important. You need sharp scissors, a good comb, and a reliable clipper to get the best results. These tools help you create the perfect style and make the cutting process easier. If you want to learn more about the essential tools you need for hair cutting, check out our website for tips and recommendations!
Final Thoughts on Hair Cutting for Men
So there you have it! Cutting hair isn’t just about snipping away; it’s an art that takes practice and patience. Whether you’re just starting out or looking to refine your skills, remember to focus on the basics first. Don’t rush through the steps. Take your time, and don’t be afraid to experiment a little. Each haircut is a chance to learn something new. And hey, if you mess up? No big deal! Just keep at it, and soon enough, you’ll be giving yourself and others some killer styles. Grab those scissors, find a willing friend or a mannequin, and start cutting. You got this!
Frequently Asked Questions
What are the basic techniques for cutting hair?
The key techniques include elevation, over-direction, and finger angles. These help you control how the hair falls and shapes.
How do I create layers in men's haircuts?
To add layers, start by sectioning the hair and cutting shorter lengths from the back to the front. This gives depth and volume.
What is face-framing and how do I do it?
Face-framing involves cutting hair around the face to highlight features. Choose lengths that suit the person's face shape.
What makes a shag haircut special?
A shag haircut is known for its choppy layers and texture. It gives a relaxed, stylish look that's easy to maintain.
Why is precision important in haircuts?
Precision ensures that the haircut looks neat and balanced. Always double-check your work to make sure all lengths match.
What tools do I need for cutting hair?
Essential tools include sharp shears, clippers, and good quality combs. Investing in quality tools makes a big difference in the results.