


Learning to draw lips can really make your portraits pop. It's all about getting the shapes right and understanding how light hits them. We'll go over the basic parts of lips, like that little dip on top, and how the bottom lip is usually fuller. Then we'll get into actually drawing them, starting simple and building up the form. Don't forget shading and color, those make a big difference in making your drawn lips look real. We'll also touch on different tools and how to get better with practice.
Key Takeaways
- Get to know the basic parts of lips, like the cupid's bow and the fuller lower lip, to draw them better.
- Start with simple shapes and connect them with smooth lines to build realistic drawn lips.
- Pay attention to where light comes from to add highlights and shadows, making your drawn lips look more three-dimensional.
- Try different drawing tools and shading methods to create different textures on your drawn lips.
- Look at lots of pictures of lips and practice drawing them from different angles to improve your skills with drawn lips.
Understanding Lip Anatomy for Drawn Lips
Alright, let's talk about what makes lips look like lips when you're drawing them. It's not just about drawing a line; there's actual structure there. Understanding this basic anatomy is going to make your drawings look way more believable. Seriously, get this part right, and everything else falls into place much easier.
The Cupid's Bow and Philtrum
So, the top lip. You know that little dip in the middle? That's the Cupid's Bow. It's usually more defined on the top lip, creating that sort of 'M' shape. Right below it, between the bottom of the nose and the top lip, is a vertical groove called the philtrum. It's like a little valley. How pronounced these are can change a lot from person to person, so keep an eye on your references. Sometimes the Cupid's Bow is really sharp, other times it's softer and more rounded.
The Fuller Lower Lip
Generally, the bottom lip is fuller than the top lip. It often has a bit more volume and curves outward. When you're drawing, think of it as a sort of rounded mound. The way it meets the top lip is important too – it's not just a straight line, but a curve that follows the form of both lips. Pay attention to how the bottom lip catches light; it often has a nice highlight that gives it that plump look.
Lip Corners and Their Shapes
Don't forget the corners! These are where the top and bottom lips meet. They can be really subtle, just a slight turn, or they can be more pronounced, especially when someone is smiling or frowning. The shape of the corners can really change the expression of the face. Some people have corners that turn up slightly even when they're relaxed, while others have corners that droop a bit. It's all about observing the subtle differences and how they affect the overall shape of the mouth.
Essential Techniques for Realistic Drawn Lips
Alright, let's get down to the nitty-gritty of making those drawn lips look like they could actually speak. It’s not just about slapping on some lines; there’s a bit of a process to it, and honestly, it’s pretty satisfying when it starts to click.
Starting with Basic Shapes
Before you even think about curves and highlights, you gotta lay down some groundwork. Think simple. Most lips, when you break them down, can be seen as a combination of basic forms. You might start with a couple of circles or ovals for the main body of the lips, and then maybe a sort of heart shape or a subtle 'M' for the upper lip's cupid's bow. It’s like building with LEGOs, really – you start with the big blocks and then add the details. Don't worry about perfection here; these are just guides to get the overall placement and volume right.
Connecting Edges with Rounded Forms
Once you've got your basic shapes down, it's time to make them look less like a geometry lesson and more like actual lips. This is where you start connecting those initial shapes with smooth, rounded lines. Pay attention to how the upper and lower lips meet at the corners. They don't just butt up against each other; there's usually a subtle curve or even a slight indentation. Think about the natural fullness of the lips, especially the lower one, and how it flows into the upper lip. It’s all about creating that soft, fleshy transition. Getting these connections right makes a huge difference in making the lips look natural.
Adding Color and Skin Tones
Now for the fun part – bringing in the color! This isn't just about picking a lipstick shade, though that's part of it. It's about understanding skin tones. Lips aren't just one flat color. They have subtle variations, undertones, and sometimes even a bit of translucency. You'll want to build up your colors gradually. Start with a base tone that matches the surrounding skin, and then layer on the lip color. Think about adding warmer tones in some areas and cooler tones in others, depending on the light and the natural color of the lips. Even if you're just using pencils, you can achieve this by varying your pressure and using different graphite grades to create a range of tones that suggest color and form.
Mastering Shading and Light on Drawn Lips

Getting the shading and light right on drawn lips is what really makes them pop, you know? It’s not just about the shape; it’s how light hits those curves. Think about where your light source is coming from. This will tell you where the bright spots, called highlights, will be and where the darker areas, the shadows, will fall.
Observing Light Source Interaction
When you’re drawing lips, really look at how light behaves. The upper lip often has a bit of a shadow underneath it, especially where it meets the face. The lower lip, being fuller, usually catches more light. The corners of the mouth can also get a little darker, depending on the expression. It’s all about noticing these little details.
Creating Depth with Highlights and Shadows
To make your lips look three-dimensional, you need to play with highlights and shadows. A bright highlight on the fullest part of the lower lip can make it look plump and wet. Then, use softer shadows in the creases or where the lips meet to give them form. Don’t be afraid to go dark in some spots to make the light areas stand out more. It’s a balancing act.
Blending Techniques for Softness
How you blend your shading makes a big difference. You can use a blending stump, a tortillon, or even just your finger (though be careful with oils from your skin!). Soft blending makes the transitions between light and shadow look smooth, like real skin. For a different look, you could try cross-hatching or stippling to build up tone, which gives a bit more texture. It really depends on the look you're going for.
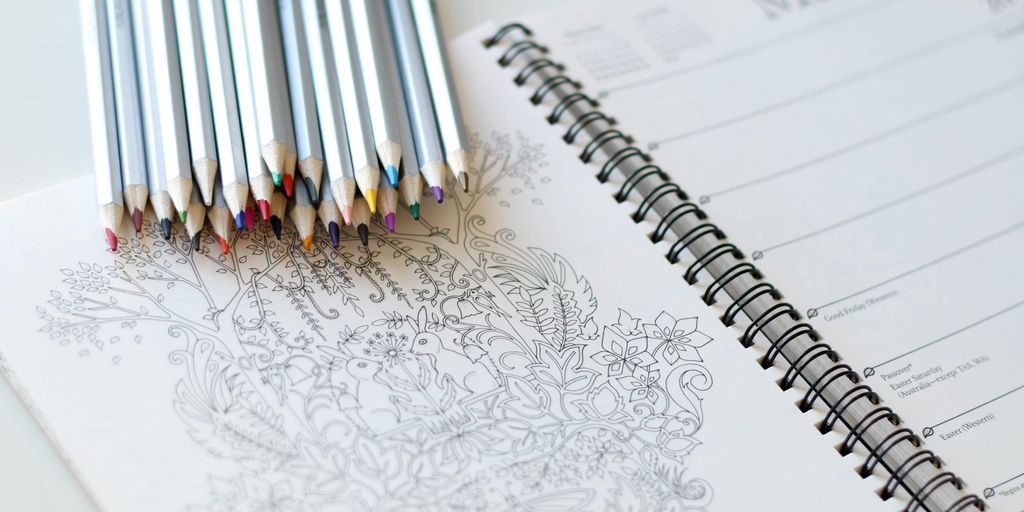
Exploring Textures and Mediums for Drawn Lips
When you're trying to make your drawn lips look like they're actually, you know, lips, the tools and how you use them really matter. It's not just about the shape; it's about the feel, the texture. Different pencils give you different vibes, and how you apply them changes everything.
Utilizing Different Pencil Grades
Think of your pencils like a painter's brushes. You've got your hard leads, like a 2H or H, which are great for light, crisp lines. These are good for the initial sketch or for those super fine details, maybe the edge of the lip or a tiny highlight. Then you move into the middle ground, like a HB or B, which are your workhorses for general shading and building up form. Finally, the softies – 2B, 4B, all the way up to 8B or even softer. These are your best friends for deep shadows and creating that smooth, velvety look. Using a range of pencils is key to getting those subtle shifts in tone that make lips look real.
Experimenting with Cross-Hatching and Stippling
Beyond just smudging, there are other ways to build up texture. Cross-hatching, where you lay down lines and then cross over them with more lines, can create really rich shadows and a sense of form. The closer the lines, the darker the area. Stippling, on the other hand, uses dots. Lots and lots of dots. It takes patience, but it can create incredibly soft transitions and a unique texture, especially for smoother skin areas around the lips.
Digital Software vs. Traditional Media
It's a bit of a debate, right? Traditional drawing, with pencils and paper, gives you a tactile experience. You can feel the tooth of the paper, the drag of the pencil. It’s very direct. Digital art, using software like Procreate or Photoshop, offers a different kind of control. You have layers, undo buttons, and a vast palette of brushes that can mimic traditional tools or create entirely new textures. You can easily adjust colors and values without starting over. Both have their place, and honestly, understanding how to work with traditional tools can often make you a better digital artist, and vice versa.
The choice between digital and traditional often comes down to personal preference and the specific look you're going for. Don't be afraid to try both and see what feels right for your workflow.
Developing Your Drawn Lips Skillset
So, you've been practicing, and that's great! But how do you actually get better? It's all about putting in the work, and not just doing the same thing over and over. You need to push yourself a bit.
Practicing from Diverse References
Don't just draw the same set of lips from the same angle every time. That's how you get stuck. Grab photos of people with different lip shapes, different ages, different ethnicities. Look at lips that are smiling, frowning, talking, or just relaxed. The more variety you see and try to replicate, the more you'll learn about how lips work in general. Think about it like learning a language – you wouldn't just learn one phrase, right? You'd want to learn lots of different ways to say things.
Drawing Lips from Various Angles
This is a big one. Lips don't always sit perfectly straight on. Try drawing them from the side, from slightly above, or even from a bit below. This really messes with your head at first because the shapes change a lot. The Cupid's bow might flatten out, or the lower lip might look much fuller. It’s a good idea to break down these complex views into simpler shapes first, just like you learned earlier. Don't be afraid to really study how the form turns.
Seeking Feedback from Art Communities
It's tough to see your own mistakes sometimes. That's where other artists come in. Share your drawings online in art groups or forums. People can point out things you might have missed, like an odd shadow or a weird curve. Be open to what they say, even if it stings a little. Constructive criticism is how you grow. Just remember to look for feedback from people who know what they're talking about, not just random comments. You can also look at what other artists are doing and try to figure out how they achieved certain effects.
Want to make your lips look amazing? Practicing your lip drawing skills is key! You can learn all sorts of cool techniques to make your drawings pop. Ready to get started? Visit our website to find the best tools and tips for your art.
Keep Practicing!
So, we've gone over how to get those lips looking just right. Remember, it's all about looking at real lips and seeing how the light hits them. Don't be afraid to mess around with different pencils or even digital tools to see what works for you. Practice makes perfect, right? Keep sketching, keep trying new things, and you'll totally get the hang of it. Happy drawing!
Frequently Asked Questions
What's the first step to drawing lips?
Start by understanding the basic shape of lips. Think of the upper lip's curve, often called the cupid's bow, and the fuller shape of the lower lip. Connecting these with soft, rounded lines helps create a natural look. Don't forget the corners where the lips meet!
Why is understanding light and shadow important for drawing lips?
Yes, knowing how light hits the lips is super important! Where light shines directly, you'll see bright spots called highlights. Deeper areas or parts turned away from the light will be darker, creating shadows. This contrast makes lips look round and real.
What kind of pencils should I use for drawing lips?
You can use different pencils! Softer pencils (like a 4B or 6B) are great for smooth shading and dark shadows. Harder pencils (like an HB or 2H) work well for lighter tones and fine details. Mixing them helps create a range of shades.
Can I use different drawing techniques for lip texture?
Absolutely! Trying different methods like cross-hatching (drawing lines close together) or stippling (using dots) can create interesting textures, like the natural texture of lips. Smudging with a finger or a blending tool can make shadows look softer and more blended.
Is it helpful to draw lips from different angles?
Definitely. Looking at photos of real lips from different angles – like straight on, from the side, or slightly tilted – helps you see how their shape changes. This practice makes your drawings more believable.
Should I get feedback on my lip drawings?
Yes, sharing your work with other artists online or in person is a fantastic way to improve. People can offer new ideas or point out things you might not have noticed, helping you get even better.