

Ever wanted to get that perfect hair style, the kind you see in magazines? Well, it's totally doable, and you don't need a fancy salon to make it happen. This guide is all about helping you understand your hair, pick the right tools, and learn some simple steps to get a great hair style right at home. We'll even cover some common slip-ups to avoid so your hair always looks its best. Get ready to rock your best hair style yet!
Key Takeaways
- Knowing your hair type is the first step to any good hair style.
- Having the right tools makes styling much easier.
- Practice makes perfect when learning new hair style techniques.
- Avoiding common errors helps keep your hair looking good.
- You can achieve a professional hair style at home with a bit of effort.
Understanding Your Hair Type for the Perfect Hair Style
Before you even think about picking up a curling iron or blow dryer, it's super important to know what kind of hair you're working with. I mean, you wouldn't use the same recipe for a cake as you would for a loaf of bread, right? Same goes for hair! Knowing your hair type is the first step to achieving the styles you see online and in magazines. It's all about understanding what your hair needs and how it behaves. Let's understand your hair type!
Identifying Your Hair Texture
Okay, so first things first: texture. Is your hair straight, wavy, curly, or coily? This is the foundation for everything else. Straight hair tends to be shiny but can get oily fast. Wavy hair has a nice natural volume but often needs help with frizz. Curly hair? It's gorgeous, but it craves moisture like nobody's business. And coily hair? It's strong and beautiful, but also needs lots of love and hydration. Here's a quick breakdown:
- Straight: Shiny, prone to oiliness.
- Wavy: Natural volume, needs frizz control.
- Curly: Prone to dryness, needs hydration.
- Coily: Strong, needs intense moisture.
Recognizing Hair Porosity
Porosity is all about how well your hair absorbs and retains moisture. Is it like a sponge, soaking everything up? Or does it repel water like a duck's back? High porosity hair absorbs moisture quickly but also loses it just as fast. Low porosity hair is the opposite – it's hard to get moisture in, but once it's there, it stays put. Medium porosity is the sweet spot, where moisture is absorbed and retained at a balanced rate. You can do a simple test at home by dropping a strand of your hair into a glass of water. If it sinks quickly, you have high porosity. If it floats for a while, you have low porosity. This will help you choose the right hair products.
Choosing Products Based on Hair Type
Now that you know your hair's texture and porosity, it's time to get serious about products. If you have straight, oily hair, look for lightweight shampoos and conditioners that won't weigh it down. Wavy hair? Opt for products that enhance your natural waves and fight frizz. Curly and coily hair will thank you for rich, moisturizing products that define your curls and keep them hydrated. And remember, porosity matters too! High porosity hair loves leave-in conditioners and oils, while low porosity hair benefits from lightweight products that won't cause buildup. Don't be afraid to experiment and see what works best for your unique locks. It's all about finding the perfect hair styling tools!
It's important to remember that everyone's hair is different, and what works for one person might not work for another. Don't be discouraged if you don't see results right away. Keep experimenting with different products and techniques until you find what makes your hair happy.
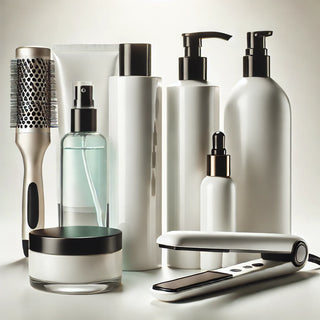
Essential Tools for Mastering Your Hair Style
Must-Have Styling Equipment
Okay, so you wanna get serious about your hair? You're gonna need the right tools. It's like trying to bake a cake without a mixing bowl – possible, but messy and probably not great. Having the right equipment can make all the difference in achieving the hairstyle you want. Here's a quick rundown of what you should have:
- Blow Dryer: A good blow dryer is a must. Look for one with different heat and speed settings. It's not just for drying; it's for styling.
- Flat Iron: For sleek, straight styles, a flat iron is your best friend. But don't overdo it with the heat!
- Curling Iron/Wand: Curls, waves, volume – a curling iron or wand can do it all. Experiment with different sizes for different looks.
- Hair Clips: Sectioning your hair is key for even styling. Get a bunch of these; you can never have too many.
- Spray Bottle: Keeping your hair damp (but not soaking wet) is important for many styles. A spray bottle is a simple but effective tool.
I remember when I first started experimenting with hair styles, I tried using a clothes iron because I didn't have a flat iron. Let's just say it didn't end well. Invest in the right tools; your hair will thank you.
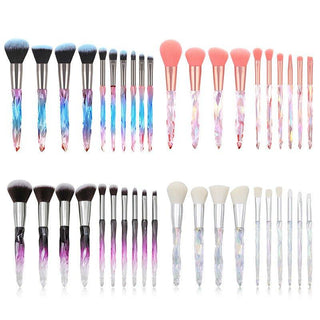
Selecting the Right Brushes
Brushes are not all created equal. Seriously. Using the wrong brush can lead to breakage, frizz, and just plain frustration. Here's the lowdown:
- Paddle Brush: Great for detangling and smoothing long hair. It's a good all-around brush to have.
- Round Brush: Essential for creating volume and bouncy curls when blow-drying. The size of the barrel determines the size of the curl.
- Wide-Tooth Comb: Perfect for detangling wet hair without causing breakage. A must-have for curly or thick hair.
- Teasing Brush: For adding volume at the roots. Use it sparingly, though, as teasing can damage your hair if done too often.
Think of brushes as specialized tools. You wouldn't use a screwdriver to hammer a nail, right? Same goes for your hair. Using the right hair texture brush will make styling so much easier.
Utilizing Heat Styling Tools Safely
Heat styling tools are amazing, but they can also wreak havoc on your hair if you're not careful. Heat damage is real, and it's not pretty. Here's how to use them safely:
- Always use a heat protectant spray. This is non-negotiable. It creates a barrier between your hair and the heat, minimizing damage.
- Use the lowest heat setting possible. Start low and gradually increase the heat until you achieve the desired results. There's no need to blast your hair with maximum heat.
- Don't hold the tool in one spot for too long. Keep it moving to avoid burning your hair.
- Clean your tools regularly. Buildup of product can cause uneven heating and damage your hair.
- Give your hair a break from heat styling. Try air-drying or using heatless styling methods a few times a week. Your hair needs time to recover.
| Tool | Safe Temperature Range | Purpose |
|---|---|---|
| Flat Iron | 250-350°F | Straightening, creating soft curls |
| Curling Iron | 200-300°F | Creating curls and waves |
| Blow Dryer | Cool to Medium | Drying, adding volume, smoothing |
Remember, healthy hair is happy hair. Treat your professional look with care, and it will look its best!
Step-by-Step Guide to Achieving Your Desired Hair Style
Preparation for Optimal Styling
Okay, so you're ready to style your hair. Awesome! But hold up – don't just jump right in. Preparation is key to getting the best results. Think of it like prepping a canvas before painting. You wouldn't start slinging paint on a dirty, uneven surface, right? Same goes for your hair. Start with clean hair. I usually wash my hair the day before, or at least a few hours before styling. This gives it time to dry completely, which is important, especially if you're using heat. Also, detangle! Use a wide-tooth comb or a brush designed for wet hair to gently remove any knots or tangles. This will make the styling process way easier and prevent breakage. Finally, apply a heat protectant. Seriously, don't skip this step! Heat protectant creates a barrier between your hair and the hot tools, minimizing damage.
Effective Blow Drying Techniques
Blow drying can be tricky. You want volume, but you don't want frizz. Here's what I've learned: First, use the right nozzle. Most blow dryers come with a concentrator nozzle, which helps to direct the airflow and prevent frizz. Point the nozzle down the hair shaft, from root to tip. This helps to smooth the cuticle and create shine. Use a round brush to lift the hair at the roots as you dry. This will add volume. Don't hold the blow dryer in one spot for too long, keep it moving to prevent heat damage. And speaking of heat, use a medium heat setting. High heat can damage your hair, especially if it's already dry or damaged. If you want to add some professional look, try flipping your head upside down while blow drying for extra volume at the roots.
Mastering Straightening and Curling
Straightening and curling – the bread and butter of hairstyling! For straightening, make sure your hair is completely dry. Section your hair into small, manageable pieces. This will ensure that each strand is evenly straightened. Use a flat iron with adjustable temperature settings. Start with a lower setting and gradually increase it until you find the right temperature for your hair type. Run the flat iron down each section of hair in a smooth, even motion. Don't clamp down too hard, or you'll create creases. For curling, you can use a curling iron, wand, or even a flat iron. The technique is similar: section your hair, wrap each section around the barrel of the curling iron or wand, and hold for a few seconds. The size of the section and the size of the barrel will determine the size and shape of the curl. For looser waves, use larger sections and a larger barrel. For tighter curls, use smaller sections and a smaller barrel. Remember to always use a protectant spray before applying heat.
I've found that the key to successful straightening and curling is practice. Don't get discouraged if your first few attempts aren't perfect. Keep experimenting with different techniques and products until you find what works best for you. And remember, healthy hair is happy hair! So, take care of your locks, and they'll reward you with beautiful styles.
Advanced Techniques for a Salon-Worthy Hair Style

So, you've got the basics down, huh? Time to level up! Getting that salon-quality look at home isn't just about knowing how to hold scissors or a curling iron. It's about mastering the finer points that separate a good haircut from a great one. Let's dive into some advanced techniques that will make people ask, "Who's your stylist?"
Precision Hair Cutting Fundamentals
Okay, forget just chopping away. We're talking surgical precision here. Understanding head shape is key. It's not just about cutting hair; it's about sculpting it. Think of it like this: you're an artist, and the hair is your clay. You need to know where to add volume, where to remove weight, and how the hair will fall. This is where understanding angles and elevation comes in. It's not enough to just cut straight across. You need to consider how the hair will move and blend. This is where the magic happens. For example, a slight change in angle can dramatically alter the final shape. It's all about control and intention. If you are having trouble with this, consider looking into professional look tutorials.
Creating Consistent Layers
Layers can make or break a hairstyle. The goal is to create layers that blend seamlessly and add movement without looking choppy. This requires a steady hand and a keen eye. Uneven layers are a dead giveaway of an amateur haircut. To achieve consistent layers, section the hair carefully and use a consistent cutting angle. Pay attention to the hair's natural fall and adjust your technique accordingly. Remember, the key is to create a gradual transition between lengths. This is where point-cutting and slicing techniques come in handy. These techniques help to soften the edges and create a more natural look. It's all about creating a harmonious flow of hair. Here are some tips for creating consistent layers:
- Use sharp scissors.
- Section the hair carefully.
- Maintain consistent tension.
- Check your work frequently.
Cross-Checking for Flawless Results
This is the final step that many people skip, but it's crucial for achieving a salon-worthy finish. Cross-checking involves going back over the haircut to identify and correct any imperfections. This is where you catch those stray hairs that didn't quite make the cut. It's also an opportunity to refine the shape and balance of the haircut. To cross-check effectively, divide the hair into small sections and comb through each section carefully. Look for any unevenness or asymmetry. Use your scissors to trim away any excess hair. Pay particular attention to the hairline and the nape of the neck. These areas are often overlooked, but they can make a big difference in the overall look. If you are not sure about your hair texture, ask a friend to help.
Don't rush this step. Take your time and be meticulous. The difference between a good haircut and a great haircut often comes down to the details. It's the little things that make all the difference.
Common Mistakes to Avoid in Your Hair Style Journey
Avoiding Uneven Sectioning
Okay, so you're ready to style your hair. Awesome! But hold up – are your sections even? Seriously, this is where a lot of people mess up. Uneven sections lead to uneven styling, period. Think about it: if one section is thicker than another, the heat from your straightener or curling iron won't distribute evenly. This means some parts will be perfectly styled, while others will be frizzy or under-styled. Not a good look. Take the extra few minutes to section your hair properly. It'll save you a ton of frustration in the long run.
Maintaining Proper Tension Control
Tension control is another biggie. What does that even mean? It means holding your hair with the right amount of firmness when you're styling it. Too loose, and you won't get the style you're after. Too tight, and you could damage your hair or end up with weird kinks. It's a balancing act.
Here's a quick guide:
- Straightening: Medium tension. Enough to smooth the hair, but not so much that you're pulling it.
- Curling: Light to medium tension. You want the hair to wrap around the barrel smoothly.
- Braiding: Consistent tension. This is key for a neat, even braid.
Practicing on a mannequin head can really help you get a feel for the right amount of tension. It might seem silly, but it's way better than messing up your own hair!
The Importance of Attention to Detail
This might sound obvious, but you'd be surprised how many people skip the small stuff. Are there flyaways? Is the back of your hair as smooth as the front? Did you get all the little hairs around your face? These details can make or break your hair style journey. Take a few extra minutes to check your work in the mirror. Use a good hairspray to tame those flyaways. And don't be afraid to ask a friend for help with the back – we can't all be contortionists! Paying attention to detail is what separates a good hairstyle from a great one. It's about those finishing touches that elevate your look from 'meh' to 'wow'.
Tips for Achieving a Professional Hair Style at Home
Assessing Hair Characteristics
Before you even think about picking up a styling tool, take a good, hard look at your hair. What's its natural texture? Is it fine, medium, or coarse? How much natural wave or curl do you have? Is it dry, oily, or somewhere in between? Understanding these basic characteristics is the first step to achieving a professional-looking style. You can't force your hair to do something it's just not built for, so work with what you've got. For example, if you have fine, straight hair, trying to create voluminous curls might be an uphill battle. Instead, focus on styles that enhance your hair's natural qualities, like a sleek, straight look or soft waves.
Understanding Face Shapes for Hair Style
Did you know that certain hairstyles look better on certain face shapes? It's true! A style that looks amazing on your friend might not be the most flattering choice for you, simply because of your face shape. Here's a quick rundown:
- Oval: Lucky you! Most styles work well with an oval face.
- Round: Add height and length to make your face appear slimmer.
- Square: Soften your angles with layers and waves.
- Heart: Balance a wider forehead with styles that add volume at the jawline.
- Long: Add width with layers and curls to avoid making your face look even longer.
I always thought face shape was just something stylists talked about to sound fancy, but it really does make a difference. I tried a blunt bob once, thinking it would look chic, but it just made my round face look even rounder. Lesson learned: know your face shape!
Experimenting with New Hair Style Trends
Don't be afraid to try new things! Hair is surprisingly resilient, and it grows back. Check out protectant spray and see what's trending on social media or in magazines. Just remember to keep your hair type and face shape in mind when choosing a new style. And don't feel like you have to jump on every trend – find what works for you and makes you feel confident. Here are some ideas to get you started:
- Braids: From simple three-strand braids to intricate fishtails, braids are a versatile way to add interest to your hair.
- Buns: A classic updo that can be dressed up or down. Try a messy bun for a casual look or a sleek, polished bun for a more formal occasion.
- Headbands: A quick and easy way to add a pop of color or style to your hair. Experiment with different widths, materials, and embellishments.
Trying out new styles is a great way to find your signature look. And who knows, you might just discover your next favorite healthy-looking hairstyle!
Want to look like you just left the salon, but from your own bathroom? It's easier than you think! With a few simple tricks, you can make your hair look amazing without spending a lot of money or time. Learn all the secrets to getting that perfect, professional hairstyle right at home by visiting our website today!
Wrapping It Up
So, there you have it. Getting your hair to look just right isn't some big secret. It's really about figuring out what works for your hair, having the right stuff to do the job, and then just trying things out. Don't be scared to play around with different styles and products. The more you mess with it, the better you'll get. Your hair is a way to show off who you are, so have fun with it and make it yours. You'll be surprised how good you can make it look with a little practice.
Frequently Asked Questions
Why is it important to know my hair type?
Knowing your hair type is super important because it helps you pick the right products and tools. Think of it like this: you wouldn't use a hammer to put in a screw, right? Same with hair! If you have curly hair, you'll use different stuff than someone with straight hair to make it look its best.
What are the most important tools for styling hair at home?
You'll want a good blow dryer, a flat iron or curling iron, and the right brushes. Don't forget hair spray or other products to help your style stay put!
How can I keep my hair safe when using hot styling tools?
Always use a heat protectant spray before using hot tools like flat irons or curling irons. This acts like a shield for your hair, keeping it from getting damaged by the heat. Also, don't hold the hot tool in one spot for too long. Keep it moving!
How can I get my hair to look like it was done at a salon, but at home?
Practice makes perfect! Start with clean, towel-dried hair. Use good products and take your time. You can also watch videos online to get tips and tricks for different styles.
What are some common mistakes people make when styling their hair?
One common mistake is using too much product. This can make your hair look greasy or stiff. Another mistake is not drying your hair completely before using a flat iron, which can cause damage. Also, make sure you're using the right temperature on your hot tools – too hot can burn your hair.
How can I make my hairstyle last all day?
To make your hairstyle last longer, start with clean hair and use products that offer good hold, like hairspray or styling mousse. Avoid touching your hair too much throughout the day, as the oils from your hands can make it go flat. You can also use dry shampoo to refresh your style on day two.