Your nails deserve as much attention and care as your skin and hair. Proper preparation is essential to achieve a stunning look, whether you're going for **salon quality nail tips** or just a simple polish. In this guide, we will delve into the essential steps for preparing your nails, diving into topics such as nail health, the risks of onycholysis, and tips for achieving the perfect base for your nails.
Understanding Your Nails
Before we dive into the nitty-gritty of nail preparation, it’s crucial to understand the anatomy of your nails and common nail issues. Your nails are made of a protein called keratin, and their health can impact not only their appearance but also how well they hold polish or extensions.
Nail Anatomy
- Nail Plate: The hard surface of your nails is what we typically see.
- Nail Bed: The skin beneath the nail plate, which supports the nail.
- Cuticle: The thin layer of skin that protects the area between the nail and the skin above it.
- Lunula: The visible part of the nail matrix, often seen as a pale half-moon shape at the base of the nail.
Nail Health: Why It Matters
Healthy nails not only look good but also set the foundation for any manicure or nail extensions you may choose to apply. Neglecting nail health can lead to issues such as **onycholysis**, a condition where the nail separates from the nail bed, potentially resulting in pain and further complications.
Signs of Unhealthy Nails
Monitor your nails for signs of underlying problems that may necessitate a break from polish or extensions. Symptoms of unhealthy nails include:
- Discoloration
- Peeling or flaking
- Increased brittleness
- Separation from the nail bed (onycholysis)
Preparing Your Nails: Essential Steps
So, how can you ensure that your nails are in prime condition? Follow these steps to prepare your nails for polish and extensions, ensuring a salon-quality finish every time.
Step 1: Gather Your Tools
Before starting, gather the essential tools needed for nail preparation:
- Nail clippers
- Nail file
- Cotton balls and nail polish remover
- Cuticle pusher
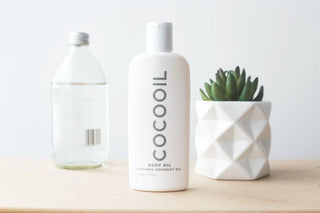
- Moisturizing lotion or cuticle oil
Step 2: Remove Old Nail Polish
Begin with clean, bare nails by removing any previous polish. Use a mild nail polish remover to avoid drying out your nails too much. Opt for an acetone-free remover for a gentler choice.
Step 3: Trim and Shape Your Nails
Use nail clippers to trim your nails to your desired length. Once trimmed, file the edges to shape them—round, square, or oval—depending on your preference. Always file in one direction to prevent splitting.
Step 4: Care for Your Cuticles
Cuticles serve an important protective function, so don’t be too aggressive with them. Gently push back your cuticles with a cuticle pusher. If you notice any hangnails, carefully trim them with cuticle scissors.
Nail Treatments for Extra Care
Consider indulging your nails with treatments designed for deeper nourishment. Many American brands offer various options available over-the-counter.
Moisturizing
Hydrating your nails and cuticles is crucial in preventing dryness and brittleness. Apply a good-quality cuticle oil or moisturizer and massage it into your nails and surrounding skin for long-lasting softness.
Strengthening Treatments
If your nails tend to be weak, consider incorporating a strengthening treatment into your nail care routine. Such products may contain beneficial ingredients like biotin or keratin to promote resilient and healthy nails.
Sanitizing for Health
In today’s world, sanitization is more important than ever. After prepping your nails, make sure to thoroughly wash your hands and tools with soap and water. Keeping everything free from bacteria is crucial for maintaining healthy nails and preventing infections.
Application: Polish and Extensions
Once your nails are perfectly prepped, it’s time for the fun part: applying polish or extensions! The way you approach this process can greatly impact the end result.
Polishing Your Nails
Applying nail polish is an art, but with a few simple strategies, you can achieve a stunning look:
- Start with a base coat to protect your nails and help polish adhere better.
- Apply nail polish in three strokes: one down the center and one on each side.
- Allow the first coat to dry before applying a second coat for full opacity.
- Finish with a top coat for a glossy finish and added durability.
Applying Nail Extensions
If you opt for nail extensions, ensure you choose a quality application method:
- Consider consulting a professional if you’re not experienced with applying extensions.
- Follow the necessary steps to ensure a secure fit and avoid onycholysis.
- After application, continue to care for your nails to maintain their health.
Maintaining Your Beautiful Nails
Your nail care journey doesn’t end once your polish or extensions are applied! Regular maintenance is crucial to ensure a lasting finish and overall nail health.
Routine Care
Incorporate these tips into your routine to maintain your beautiful nails:
- Reapply cuticle oil daily for hydration.
- Avoid using nails as tools to minimize damage.
- Schedule regular breaks from polish and extensions to let your nails breathe.
Dealing with Problems
If you notice any of the signs of unhealthy nails such as onycholysis, don’t hesitate to minimize nail polish usage and seek advice from a healthcare professional if necessary. Maintaining restful periods without applications allows your nails to recover and regain their strength.
Your Amazing Nail Journey
Embarking on a nail care journey means treating your nails with the love and care they need. By understanding the basics of nail health, you can prepare yourself to achieve stunning results that rival even **salon quality nail tips**. With consistent care and the right preparation techniques, you can flaunt gorgeous nails, whether you choose to keep it simple with polished colors or to glam it up with the latest in **velvet nails**. Unlock your nail’s true potential, and let your creativity shine through care and dedication!


