


If you're dreaming of gorgeous, salon-quality nails without the hefty price tag or time-consuming visits, you're in for a treat! Nail wraps have revolutionized at-home nail care, allowing you to express your style and creativity effortlessly. This ultimate guide will cover everything you need to know about nail wraps, including how to choose them, apply them, remove them, and even tips to keep them looking fresh for longer. Let’s dive into this colorful world of nail wraps and transform your nails into a canvas of artistic expression!


What Are Nail Wraps?
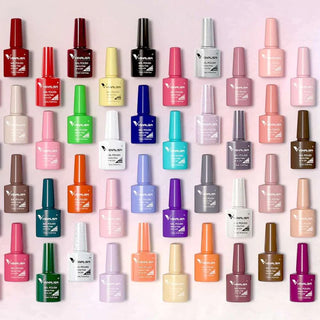
Nail wraps are thin, adhesive strips crafted from various materials, including vinyl, plastic, and even real polish. They're designed to be placed over your natural nails, making it easy to achieve that intricate nail art look without the need for any special skills or tools. Available in a plethora of sizes, colors, and patterns, nail wraps can cater to different tastes, occasions, and styles, ensuring that there is something for everyone!
The Benefits of Using Nail Wraps
Nail wraps provide an array of benefits that make them a popular choice for those wanting to enhance their manicure game. Here are some compelling reasons why you should consider using nail wraps:
- Time-Saving: Applying nail wraps is a breeze and often takes less time than traditional nail polish application. What used to take you an hour at the salon can now be done in under 30 minutes at home!
- Long-Lasting: High-quality nail wraps can last two weeks or more when applied and maintained correctly, making them a durable alternative to nail polish that chips easily.
- No Drying Time: Say goodbye to waiting around for your nails to dry! Nail wraps adhere quickly and eliminate the risk of smudging your manicure because of accidental touches.
- Easy Removal: Nail wraps can be removed simply by peeling them away. No need for acetone or complex removal processes—just a little heat and they're off!
- Variety of Designs: Whether you love classic solids, trendy prints, or festive graphics, the vast array of options means you'll never run out of creative ideas for your nails.
How to Choose the Right Nail Wraps
With countless designs and styles available, selecting the perfect nail wraps can be a daunting task. Here are some tips to help you find a set that fits your personality and needs:
1. Consider Your Style
Take a moment to reflect on your overall aesthetic. Do you favor a minimalist approach with muted tones, or do you thrive on bold, eye-catching patterns? Selecting wraps that match your personal style will ensure you love your manicure.
2. Nail Size
It’s essential to choose nail wraps that fit your nails properly. Measure the width of your nails and consult the brand's sizing guide to find the best match. Many companies provide flexible wraps that can be trimmed for a perfect fit, so don’t hesitate to experiment!
3. Occasion
Consider the context in which you'll wear the nail wraps. For professional settings, opt for elegant designs or solid colors. If you're attending a festive event, feel free to embrace glitter, patterns, and vibrant hues.
4. Quality Matters
Investing in high-quality nail wraps is crucial for a successful manicure. Look for reputable brands with positive reviews, as superior materials will adhere better and stay intact longer.
How to Apply Nail Wraps
Excited to apply your nail wraps? Follow these easy steps for a flawless application:
Step 1: Prepare Your Nails
Start with clean, dry nails. Remove any old nail polish and wash your hands thoroughly. For the best results, consider pushing back cuticles and trimming them for a neat base.
Step 2: Choose the Right Size
Pick a nail wrap that fits your nail size. If it seems too large, you can easily trim it down. Remember, it's better to start with a larger wrap and fine-tune it than compromise on coverage.
Step 3: Apply the Wrap
Carefully peel the wrap off its backing. Align the wrap at the base of your nail, ensuring it covers the nail completely. Press down gently as you move towards the tip of the nail, smoothing out any air bubbles as you go.
Step 4: Seal the Edges
Press the edges of the wrap firmly to ensure proper adhesion. A nail file can help you file away any excess wrap after application, giving you a clean look.
Step 5: Finish with a Top Coat (Optional)
Applying a clear top coat can enhance the durability and shine of your nail wraps, although it's not absolutely necessary. If you choose to use one, ensure it’s compatible with the materials used in the wraps.
How to Remove Nail Wraps
When it’s time to change your nail wrap design, removing them is easy. Here’s how to do it effectively:
Step 1: Heat the Wraps
Use a hairdryer to apply a gentle amount of heat to the nail wraps for about 10-15 seconds. The warmth will loosen the adhesive, making it easier to peel off the wraps.
Step 2: Peel Off the Wraps
Starting from the base of the nail, carefully peel off the wrap. If it resists, apply more heat and try again to avoid damaging your natural nails.
Step 3: Clean Up
Once the wraps are removed, you may notice some residue. A bit of nail polish remover can assist in cleaning up any leftover adhesive, leaving your nails fresh and ready for the next design.
Tips for Making Your Nail Wraps Last Longer
To maximize the longevity of your nail wraps, consider these helpful tips:
- Allow your nails to remain dry for at least an hour post-application to ensure full adhesion.
- Avoid using your nails as tools; this can lift or damage the wraps.
- For cleaning tasks, use gloves to protect your nails from harsh chemicals.
- If a wrap chips, you can use a similar shade of nail polish to touch it up temporarily.
- Consider applying cuticle oil regularly to keep your nails healthy and the wraps intact.
Where to Buy Nail Wraps
Nail wraps are easily accessible both online and in physical stores. Here are some popular places to look:
- Beauty Supply Stores: Visit local beauty supply shops to browse their selection of nail wraps.
- Online Retailers: Websites like Amazon, Etsy, and the official sites of specific brands offer extensive collections with customer reviews to help guide your purchase.
- Subscription Boxes: Joining a beauty subscription box can introduce you to new nail wrap brands and styles monthly, adding variety to your collection.
- Local Salons: Some salons sell nail wraps alongside their services. This is a great way to pick up a unique set directly from professionals.
Eco-Friendly Nail Wraps
As sustainability becomes increasingly important, many brands are starting to offer eco-friendly nail wraps made from sustainable materials. If you are environmentally conscious, look for wraps that are free from harmful chemicals and made with recycled materials. These options not only allow you to express your style but also align with your values!
Trendy Nail Wrap Designs
Nail wrap trends continue to evolve, keeping things fresh and exciting. Here are some popular design themes to consider:
- Geometric Patterns: Clean, bold lines and shapes are trending, offering a modern and sophisticated look.
- Floral Designs: Various flower prints, from delicate daisies to vibrant roses, are perfect for spring and summer.
- Textured Wraps: Embrace designs that mimic textures like marble, glitter, or even leather for a chic finish.
- Seasonal Themes: Celebrate holidays with themed designs, like snowflakes for winter and pumpkins for fall.
Conclusion
Nail wraps are a game-changer for anyone looking to achieve stunning nails without the salon hassle. Their ease of application, variety of designs, and long-lasting nature make them a fantastic option for nail enthusiasts of all skill levels. With just a little practice, you can create beautiful manicures that are uniquely yours. So, get inspired, explore different styles, and enjoy the creative process of transforming your nails into a work of art, all from the comfort of your home!
Now that you're armed with knowledge about nail wraps, it's time to dive in and unleash your nail creativity. Happy wrapping!