Ever looked at your nails and thought they needed a little extra something? Nail in gel might just be your answer. This guide is here to walk you through everything from what nail in gel actually is, to how you can start doing it yourself at home. Whether you're tired of regular polish chipping or just want to try something new, we've got you covered.
Key Takeaways
- Nail in gel offers a durable and long-lasting alternative to regular nail polish.
- Proper tools like gel brushes and UV/LED lamps are essential for the best results.
- Avoid common mistakes by applying thin layers and ensuring nails are clean before starting.
- Creative designs with gel can include nail art, chrome, and holographic effects.
- Maintaining nail health is crucial, so learn how to safely remove gel polish without damage.
Understanding Nail in Gel Techniques
What is Nail in Gel?
Nail in gel is a popular technique in the nail industry that involves applying a gel-based product onto the natural nail or nail extensions. This method is favored for its durability and glossy finish. The gel is applied in layers and cured under a UV or LED lamp, which solidifies the gel through a process called polymerization. This process transforms the liquid gel into a hard, shiny surface that can last for weeks without chipping.
Benefits of Nail in Gel
- Long-lasting Wear: Gel nails can last up to three weeks or more without losing their shine or chipping, making them ideal for those who want a low-maintenance manicure.
- Natural Look and Feel: Unlike some other nail enhancements, gel nails are thin and flexible, providing a more natural appearance.
- Versatility in Design: With gel, you can achieve various designs, from simple solid colors to intricate nail art, and even incorporate elements like chrome powders.
Common Misconceptions About Nail in Gel
- "Gel Nails Damage Natural Nails": A common myth is that gel nails damage your natural nails. However, if applied and removed correctly, they can be quite safe.
- "Gel Nails are the Same as Acrylics": While both are popular nail enhancements, gel nails are different from acrylics in terms of application and finish. Gels are more flexible and offer a glossier finish.
- "Only Professionals Can Apply Gel Nails": While professional application is recommended for the best results, many at-home kits, like The Ultimate Gel Nail Polish Set, make it possible to achieve salon-quality nails at home.
Essential Tools for Nail in Gel Application

Choosing the Right Gel Brushes
When diving into the world of gel nails, having the right brushes is like having a good set of knives in the kitchen. Regular nail polish brushes just don't cut it here. Gel polish is thicker, so you'll need brushes with stiff bristles to get that smooth, streak-free finish. Look for an angled brush for covering larger areas and a fine-tipped one for those delicate details and nail art. Trust me, investing in quality gel brushes will make your DIY manicure feel like a trip to the salon.
Importance of a Quality UV/LED Lamp
A good lamp is non-negotiable if you're serious about gel nails. The lamp is what cures the gel, making it hard and shiny. Without it, your manicure won't last. So, what's the deal? LED lamps are faster and more energy-efficient, curing nails in about 30-60 seconds. UV lamps, on the other hand, take a bit longer—about 2 minutes—but they work with all types of gel polish. Whichever you choose, make sure it has the right wattage for your gel polish to avoid under-curing, which can lead to smudging and chipping.
Must-Have Accessories for Gel Nails
Here's your checklist for a successful gel nail session:
- Cuticle Oil: Keeps your cuticles moisturized and prevents them from drying out.
- Cotton Swabs & Lint-Free Wipes: Perfect for cleaning up any mistakes before curing and removing the tacky layer afterward.
- Nail File & Buffer: Essential for shaping your nails and smoothing out any ridges.
- Base Coat & Top Coat: These are your manicure's foundation and seal. They protect your nails and keep your polish looking fresh.
- Acetone & Orangewood Stick: Handy for removing old polish and pushing back cuticles.
With these tools in your arsenal, you're all set to create stunning gel nails right at home. Remember, practice makes perfect, so take your time and enjoy the process!
For those just starting out or looking to upgrade their setup, consider checking out the Ultimate UV Gel Nail Art Kit. It comes with a powerful 36W nail dryer lamp and a variety of gel polish colors, plus all the essential accessories you need for professional-quality results at home.
Step-by-Step Guide to Applying Nail in Gel

Preparing Your Nails for Gel Application
Before diving into the colorful world of gel polish, it's crucial to prepare your nails properly. Start by trimming your nails to your desired length and shape them with a nail file. Gently buff the surface of each nail to remove any shine; this helps the gel adhere better. Make sure your nails are clean and free of oils by wiping them with rubbing alcohol or a lint-free wipe. This step is essential for a smooth application.
Applying the Base Coat Correctly
The base coat is your foundation for a long-lasting gel manicure. Apply a very thin layer of base coat to each nail, ensuring you seal the tips to prevent chipping. Thin layers are key to avoiding a bulky finish. Cure the base coat under a UV or LED lamp according to the product instructions—usually 30-60 seconds for LED or 2 minutes for UV. This step locks in the base layer, setting the stage for your color.
Mastering the Art of Gel Polish Application
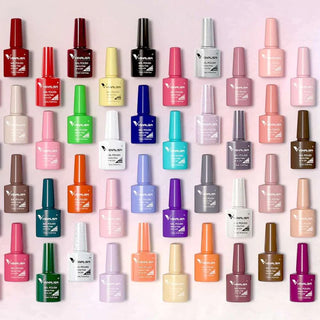
Now comes the fun part—adding color! Choose a shade from your favorite gel polish collection, like the Three Step Gel Polish Color Book with its stunning 640 colors. Apply a thin, even coat of gel polish to each nail. If you accidentally get polish on your skin, use a small brush or a toothpick to clean it up before curing. Cure each layer under the lamp for the recommended time. Depending on the color, you might need two or three coats for full coverage. Finish with a top coat, curing it to seal in your masterpiece.
With patience and practice, your DIY gel manicure can look just as good as a salon's. Take your time with each step, and you'll end up with a set of nails that are not only beautiful but also durable.
Avoiding Common Mistakes in Nail in Gel

Preventing Gel Polish from Lifting
One of the most frustrating issues with gel nails is when the polish starts to lift. Preventing lifting begins with proper nail prep. Ensure your nails are clean and free from any oils by using a good nail cleanser or rubbing alcohol. Buffing the nail surface slightly can also help the gel adhere better. When applying the gel, avoid getting any on your cuticles, as this can cause lifting as the polish grows out.
Ensuring Proper Curing Times
Curing your gel polish correctly is crucial for a lasting manicure. Each layer of gel needs to be cured under a UV or LED lamp for the recommended time. If you don't cure it long enough, the polish won't set properly, leading to smudging and chipping. Make sure your lamp is compatible with your gel polish brand and always follow the specific curing times indicated on the product.
Tips for a Long-Lasting Gel Manicure
- Thin Coats are Key: Apply thin layers of gel polish. Thick layers can lead to uneven curing and increase the risk of chipping.
- Seal the Edges: Make sure to seal the tips of your nails with each layer to prevent chipping.
- Patience is Essential: Allow each layer to cure completely before applying the next. Rushing can lead to a less durable manicure.
Gel nails can be a game-changer for those who love long-lasting, glossy nails. By taking the time to apply and cure the gel properly, you can enjoy a salon-quality manicure at home. And remember, practice makes perfect. You'll get the hang of it with time and patience.
Exploring Creative Designs with Nail in Gel
Incorporating Nail Art into Gel Manicures
Nail art is like the cherry on top of a sundae when it comes to gel manicures. It adds that extra flair and personality. You can start with simple designs like dots or stripes and gradually move to more complex patterns. Stickers and stamps are also great tools for those who aren't confident in their freehand skills. The beauty of gel is that it holds the design perfectly, maintaining its vibrancy and shine for weeks. Don't be afraid to experiment—your nails are your canvas!
Using Chrome and Holographic Powders
Chrome and holographic powders are all the rage right now. These powders transform your gel nails into shimmering works of art. To apply, simply rub the powder onto a cured gel polish using an applicator or your finger. Seal it with a top coat, and voilà—your nails will reflect light in every color of the rainbow. This technique is perfect for anyone looking to make a bold statement. If you're interested in enhancing your overall beauty routine, consider checking out the Navy Green Holographic Glitter Eye Shadow & Lip Gloss Stick from LIPOXI.
Seasonal Trends in Gel Nail Designs
Keeping up with seasonal trends can be a fun way to refresh your nail game. In spring, think pastels and florals. Summer calls for bright, bold colors and maybe even some tropical designs. As fall approaches, switch to warm tones like burnt orange and maroon. Winter is the perfect time for icy blues and glittery silvers. Following these trends not only keeps your nails stylish but also allows you to play with different colors and designs throughout the year.
When it comes to nail art, the possibilities are endless. Whether you want a subtle look or something that stands out, gel nails offer the flexibility to achieve it all. Just remember, practice makes perfect. So grab your tools and start creating!
Maintaining Healthy Nails with Gel Manicures

Nail Care Tips for Gel Users
Keeping your nails healthy while enjoying gel manicures is all about balance. Moisturizing is your best friend; use cuticle oil daily to prevent dryness and brittleness. Also, take breaks between gel applications to let your nails breathe. When filing, always go in one direction to avoid splitting.
- Use a nourishing base coat to protect your natural nails.
- Avoid peeling off gel polish as it can damage the nail surface.
- Choose a quality UV Gel Nail Polish like JTING for a long-lasting finish.
Signs of Nail Damage to Watch For
Sometimes, despite our best efforts, nails can show signs of distress. Look out for these indicators:
- White spots or lines on the nail bed.
- Peeling or splitting nails.
- Persistent dryness or brittleness.
If you notice any of these, it might be time to give your nails a break from gels and focus on nourishing treatments instead.
How to Safely Remove Gel Polish
Removing gel polish the right way is crucial to maintaining nail health. Start by gently buffing the top layer of the gel to break the seal. Then, soak a cotton ball in acetone, place it on the nail, and wrap it in foil. Leave it on for about 10-15 minutes.
- Use an orangewood stick to gently push off the softened gel.
- Avoid scraping or using metal tools to prevent damage.
- Finish with a hydrating hand cream to restore moisture.
Taking care of your nails means not just enjoying the beauty of gel manicures, but also ensuring they remain strong and healthy. With these tips, you can enjoy stunning nails without compromising their health.
Comparing Nail in Gel with Other Techniques
Nail in Gel vs. Acrylics
When it comes to comparing nail in gel and acrylics, there are a few key differences to consider. Acrylics are known for their strength and durability, making them a go-to choice for those who want long-lasting nail extensions. They are created using a liquid monomer and a powder polymer, which form a hard protective layer over the natural nails. On the flip side, nail in gel offers a more flexible and natural look, often preferred for its glossy finish. While acrylics can be more resilient, they also tend to be thicker and may feel heavier on the nails.
- Application Process:
- Acrylics require mixing and can emit strong odors.
- Gel nails are pre-mixed and have a more pleasant application experience.
- Durability:
- Both are durable, but acrylics might last a bit longer.
- Removal:
- Acrylics are removed by soaking in acetone, which can be drying.
- Gel nails are soaked off or gently filed down.
Nail in Gel vs. Regular Polish
Regular polish is the classic choice for many, but how does it stack up against nail in gel? Regular polish is easy to apply and remove, making it a convenient option for quick changes. However, it lacks the staying power of gel nails. Gel nails can last up to two weeks without chipping, whereas regular polish might only last a few days before showing signs of wear.
- Finish:
- Gel nails have a high-gloss, chip-free finish.
- Regular polish can dull and chip easily.
- Curing:
- Gel requires curing under a UV or LED lamp.
- Regular polish air-dries, which is quicker but less durable.
Choosing the Best Technique for Your Lifestyle
Selecting the right nail technique often depends on your lifestyle and preferences. If you're someone who needs a quick and easy option, regular polish might be the way to go. For those who want long-lasting, beautiful nails with minimal maintenance, nail in gel is an excellent choice. Acrylics are ideal if you need extra strength and length but are willing to commit to a more involved application and removal process.
Ultimately, the best choice is the one that suits your daily routine and personal style. Whether you prefer the flexibility of gel, the strength of acrylics, or the simplicity of regular polish, there's a perfect option out there for everyone.
When it comes to nail techniques, gel nails stand out for their shine and durability. However, it's important to compare them with other methods like acrylics and regular polish. Each technique has its own pros and cons, so understanding these can help you make the best choice for your nails. For more tips and to explore our nail products, visit our website today!
Wrapping It Up: Your Gel Nail Adventure Awaits
So there you have it, folks! With all these tips and tricks up your sleeve, you're more than ready to dive into the world of gel nails right from the comfort of your home. Remember, it's all about patience and practice. Don't worry if your first few tries aren't perfect—it's all part of the learning curve. Keep your tools handy, follow the steps, and soon you'll be flaunting salon-quality nails without the hefty price tag. So go ahead, unleash your creativity, and let your nails do the talking. Happy painting!
Frequently Asked Questions
Can I use a regular nail polish brush for gel nail polish?
While you can try using a regular brush, it's not the best choice. Gel polish is thicker, so special gel brushes with firm bristles help apply it smoothly without streaks.
How can I avoid common mistakes when applying gel nail polish?
To avoid mistakes, apply thin layers, keep polish off cuticles, clean nails well before starting, cure properly, and don’t rush the process.
Is it safe to do gel nails at home?
Yes, it's safe if you follow instructions and use the right tools. Make sure to use a good lamp, follow product guidelines, and protect your skin from UV light.
What tools do I need for applying gel nails at home?
You'll need gel brushes, a UV/LED lamp, cuticle oil, cotton swabs, lint-free wipes, base and top coats, a nail file, a buffer, acetone, and a cuticle stick.
How do I make my gel manicure last longer?
To make it last, apply thin coats, avoid getting polish on your skin, cure each layer well, and keep your nails clean and dry.
What should I do if my gel polish starts to lift or peel?
If it starts lifting, gently file the edges, clean the nail, and reapply a thin layer of top coat, then cure it again.


