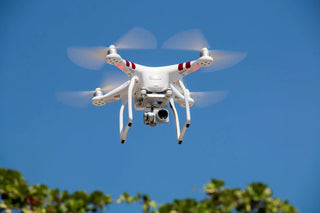
In 2024, camera drones are changing the way we see the world. They're not just for tech geeks anymore. Whether you're a newbie or a seasoned flyer, drones are opening up new possibilities for capturing stunning landscapes from above. This guide will walk you through everything you need to know about using a camera drone for aerial photography. From picking the right drone to mastering the art of post-processing, we've got you covered.
Key Takeaways
- Picking the right camera drone can make or break your aerial photography experience. Consider specs, models, and budget before buying.
- Learning to control your drone is essential. Start with basic maneuvers and gradually explore advanced modes to capture better photos.
- Camera settings are crucial for great shots. Adjust exposure, ISO, and use filters to enhance image quality depending on the light.
- Creative composition can elevate your aerial photos. Use techniques like the rule of thirds and leading lines to capture unique perspectives.
- Post-processing is your friend. Use editing software to enhance colors and details, and try creating panoramas and HDR images.
Choosing the Right Camera Drone for Aerial Photography

Understanding Drone Specifications
Picking the right drone starts with understanding the specifications that matter most for aerial photography. Key specs to look for include camera resolution, flight time, and gimbal stability. A higher camera resolution means sharper images, while longer flight times allow for extended shooting sessions. Gimbal stability is crucial for smooth, shake-free footage.
- Camera Resolution: Look for at least 12MP for decent quality.
- Flight Time: Aim for drones offering 20 minutes or more.
- Gimbal: A 3-axis gimbal is ideal for stabilized shots.
These specs will guide you in choosing a drone that meets your photography needs.
Comparing Popular Drone Models
The drone market is buzzing with options. Here’s a quick comparison of some popular models:
| Model | Camera Quality | Flight Time | Price Range |
|---|---|---|---|
| DJI Mini 2 | 12MP | 31 minutes | $450 - $500 |
| DJI Air 2S | 20MP | 31 minutes | $999 - $1,299 |
| Skydio 2+ | 12MP | 27 minutes | $1,099 - $1,299 |
Each model has its strengths. For instance, the DJI Air 2S offers professional-grade quality, suitable for ambitious beginners. Meanwhile, the Skydio 2+ is known for its autonomous flying capabilities.
Budget Considerations for Drone Purchases
When setting a budget for your drone purchase, consider not just the upfront cost but also the long-term expenses. Here are some tips:
- Initial Cost: Set a realistic budget depending on your skill level and needs.
- Accessories: Factor in costs for extra batteries, propellers, and a carrying case.
- Insurance: Consider insuring your drone against damage or loss.
Buying a drone is an investment. Weigh the features against the cost to ensure you get the best value for your money.
Choosing the right drone involves more than just picking the most expensive model. It's about finding the right balance between features, performance, and price.
Mastering Drone Controls and Flight Techniques
Basic Flight Maneuvers
Getting the hang of flying a drone is like learning to ride a bike. At first, it might feel awkward, but with practice, it becomes second nature. Start with the basics. Begin by placing your drone on a flat surface, ensuring the front faces away from you. This helps avoid confusion with orientation. To lift off, gently press the left stick up. Your drone will rise. To descend, pull the stick down. Practice these simple up-and-down movements until you feel comfortable.
Once you're confident, try moving the drone in different directions. Use the right stick to move forward, backward, left, and right. Practice these maneuvers until they feel natural. Remember, the key is to be gentle with the controls.
Advanced Flight Modes for Photography
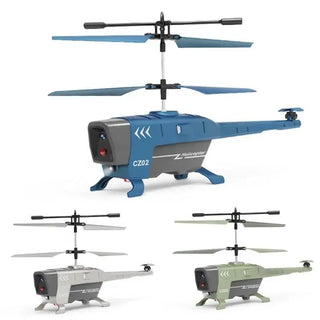
When you're ready to step up your game, explore advanced flight modes. Many drones, like the Dual 4K Camera Foldable Drone, offer intelligent flight modes that can transform your photography. These modes allow your drone to follow a subject, circle around it, or fly along a preset path, all without manual control. It's like having an autopilot for your camera!
Experiment with these modes to capture stunning shots. For instance, use the "orbit" mode to circle around a subject, keeping it in the center of the frame. Or try the "follow me" mode for dynamic action shots. These advanced features can give your footage a professional touch.
Safety Tips for Drone Pilots
Flying a drone is thrilling, but safety should always be a priority. Here are some tips to keep in mind:
- Keep your drone in sight: Even if you're using FPV gear, always maintain a visual line of sight.
- Check your surroundings: Choose an open area free of obstacles like trees and buildings.
- Monitor battery levels: Ensure your drone's batteries are fully charged before flight.
Flying a drone is not just about capturing breathtaking views; it's about doing so responsibly. Be mindful of your surroundings and always prioritize safety.
Remember, practice makes perfect. The more you fly, the more intuitive these controls and maneuvers will become. Happy flying!
Optimizing Camera Settings for Stunning Aerial Shots
Adjusting Exposure and ISO
Getting the exposure right is crucial for capturing breathtaking aerial shots. Always shoot in manual mode to have full control over your camera settings. Use the histogram to help adjust your exposure correctly, ensuring the light and dark areas are balanced. A lower ISO setting is typically best for aerial photography, as it reduces noise and keeps your images sharp. If you're flying during the day, start with an ISO of 100 and adjust as needed based on the lighting conditions.
Using Filters for Better Image Quality
Filters can be game-changers in aerial photography. They help manage reflections and enhance colors, providing more vivid and dynamic images. Here are a few types to consider:
- Polarizing Filters: Reduce glare from reflective surfaces like water or glass.
- Neutral Density (ND) Filters: Allow for slower shutter speeds even in bright conditions, perfect for capturing motion blur.
- UV Filters: Protect your lens from dust and scratches while slightly enhancing image clarity.
Setting Up for Different Lighting Conditions
Lighting can make or break your aerial shots. Here are some tips to optimize your settings:
- Golden Hour: Shoot during sunrise or sunset for soft, diffused light that adds warmth to your images.
- Cloudy Days: Use this time to capture even lighting with less contrast, perfect for detailed shots.
- Bright Sunlight: Use ND filters to avoid overexposure and maintain image quality.
Remember, the Adventure Ready Dual Camera Folding Drone is perfect for beginners wanting to explore these settings, thanks to its intuitive design and dual camera setup. Its compact structure makes it easy to transport, allowing you to capture stunning aerial footage wherever you go. Adventure Ready Dual Camera Folding Drone
Exploring Creative Composition Techniques with Camera Drones
Utilizing the Rule of Thirds
When you're up in the sky with your drone, it's easy to forget about composition. But the rule of thirds is a game-changer. Imagine dividing your frame into nine equal parts with two horizontal and two vertical lines. Place key elements along these lines or at their intersections to create a balanced, engaging shot. This technique helps guide the viewer's eye and makes your photos more visually appealing.
Capturing Unique Perspectives
One of the coolest things about drones is their ability to capture angles that are impossible from the ground. Try flying your drone low and then gradually rising to reveal more of the scene, a technique known as "the unveiling." This can add a dramatic flair to your shots. Also, experiment with top-down shots to capture fascinating patterns and textures that aren't visible from the ground.
Incorporating Leading Lines in Aerial Shots
Leading lines are powerful in guiding the viewer's eye through the photo. Look for natural lines like roads, rivers, or even shadows in your landscape. Position these lines so they lead towards your subject or across the frame. This adds depth and draws attention to the main elements of your photo.
Aerial photography opens up a world of creative possibilities. By mastering these composition techniques, your drone shots can tell compelling stories and captivate viewers' imaginations. Remember, practice makes perfect, so keep experimenting with different angles and compositions to find your unique style.
Post-Processing Your Aerial Photography

Choosing the Right Editing Software
When it comes to polishing your drone photos, picking the right software is a game-changer. Adobe Lightroom is a favorite for many photographers, offering robust tools for tweaking colors and lighting. If you're into video editing, DaVinci Resolve is a solid free option, while Final Cut Pro X caters to Mac users with its professional-grade features. For those who want quick enhancements, Luminar AI uses artificial intelligence to speed up the process.
Enhancing Colors and Details
Getting your photos to pop is all about playing with colors and sharpening details. Start by adjusting the white balance to ensure your colors look natural. Then, dive into the vibrance and saturation settings to make those hues stand out. Don't forget about the clarity slider; it can bring out textures and make your images look crisper.
Creating Panoramas and HDR Images
Panoramas and HDR images can give your aerial shots a whole new dimension. For panoramas, software like PhotoStitcher is great for beginners. It's easy to use and works well for stitching multiple photos together seamlessly. HDR images, on the other hand, are all about balancing light and shadows. Use the bracketing technique to capture multiple exposures and merge them for the perfect shot.
Post-processing is where your creativity really shines. It's not just about fixing mistakes, but about crafting your vision into reality. So, take your time, experiment, and enjoy the process!
Understanding Drone Regulations and Safety Guidelines

Registering Your Drone Legally
Flying a drone isn't just about having fun and capturing amazing shots; it's also about following the rules. First things first, you need to get your drone registered. In many countries, registering your drone is a legal requirement. It's like getting a license plate for a car. This process usually involves providing details about your drone and paying a small fee. Make sure to keep your registration documents handy whenever you're out flying.
Complying with Airspace Rules
Airspace rules are crucial for keeping the skies safe for everyone. Here’s a quick rundown of what you need to keep in mind:
- Stay below 400 feet: This is the standard maximum altitude for drones in many places.
- Keep your drone in sight: Always have a clear line of sight to your drone.
- Avoid airports: Stay at least 5 miles away from airports unless you have permission.
- Respect privacy: Don’t fly over private property without permission.
- Check for no-fly zones: Use apps like B4UFLY to ensure you’re not in restricted areas.
Ensuring Privacy and Safety
Respecting others' privacy is just as important as following airspace rules. Avoid flying over people, especially in crowded areas. If you're capturing footage, be mindful of what you’re filming and who might be in the frame. Also, always check the weather before heading out. Flying in bad weather can be risky and might lead to accidents.
Remember, flying a drone comes with responsibilities. Always stay informed about the latest regulations to keep your flights safe and legal.
Essential Accessories for Enhancing Drone Photography

Must-Have Drone Accessories
When you're diving into drone photography, having the right gear can make all the difference. Extra batteries are a must-have because nothing's worse than running out of juice right when you find the perfect shot. You should also grab some ND filters; these help manage light exposure, especially in bright conditions, making your videos look smooth and professional.
A 6-Channel 6-Axis Pocket Drone is compact yet powerful, and it comes with some essential accessories for immediate use. It's a great starting point for both beginners and seasoned pilots.
Protective Gear for Your Drone
Keeping your drone safe should be a top priority. Invest in propeller guards to avoid damage during those tricky indoor flights or while you're still getting the hang of things. A solid carrying case is also essential to protect your drone from bumps and scratches while on the move.
Storage Solutions for Aerial Footage
Capturing stunning visuals is only half the battle; you need to store them too. High-speed memory cards are crucial, especially if you're shooting in 4K. They ensure you don't miss any detail and can handle the large file sizes that come with high-resolution footage. Keep a few spares handy so you're always ready to capture more.
If you want to take your drone photography to the next level, having the right accessories is key! From filters to extra batteries, these tools can help you capture stunning images. Check out our website for the best gear to enhance your drone photography experience!
Conclusion
So, there you have it, folks. Aerial photography with drones is not just a hobby; it's a whole new way to see the world. Whether you're capturing the sweeping vistas of a mountain range or the intricate patterns of a cityscape, drones offer a unique perspective that's hard to beat. As you get more comfortable with your drone, you'll find that the possibilities are endless. Just remember to keep practicing, stay safe, and always respect the rules of the sky. With time and creativity, you'll be snapping shots that are not only stunning but also tell a story from above. Happy flying, and may your skies be clear and your shots be sharp!
Frequently Asked Questions
What is the best drone for beginners in aerial photography?
For beginners, a drone like the DJI Mini 2 is great. It's easy to fly and takes good pictures without being too expensive.
How can I make sure my drone photos are clear and sharp?
To get clear photos, try flying your drone slowly and use a low ISO setting. Also, make sure your drone is stable when taking pictures.
Are there any rules I need to follow when flying my drone?
Yes, there are rules. You should always fly below 400 feet, keep your drone in sight, and avoid flying over people or near airports.
What should I look for when buying a drone for photography?
Look for drones with good cameras, long battery life, and easy-to-use controls. It's also important to consider your budget.
Can I edit my drone photos after taking them?
Yes, you can use editing software like Adobe Lightroom to make your photos look even better by adjusting colors and brightness.
Why do some drone photos look better during certain times of the day?
Photos often look better during the golden hour, which is right after sunrise or before sunset, because the light is soft and warm.

