Ever thought about getting salon-quality nails without actually going to a salon? Well, gelicure nails might just be your new best friend. They’re all about giving you that glossy, long-lasting finish right at home. With the right tools and a bit of patience, you can nail it (pun intended) without breaking the bank. This guide will walk you through everything you need to know to get those perfect gelicure nails at home.
Key Takeaways
- Gelicure nails offer a salon-like finish at home, perfect for those who want long-lasting, shiny nails.
- Essential tools include a UV or LED lamp and quality gel polish for the best results.
- Proper nail preparation is crucial to ensure the gelicure lasts longer and looks professional.
- Avoid common mistakes like skipping the base coat or not curing properly to prevent chipping.
- Safe removal is important to avoid nail damage, so follow the right steps and use the proper tools.
Understanding Gelicure Nails

What Are Gelicure Nails?
Gelicure nails are a popular type of manicure that combines the durability of gel with the ease of regular polish. These nails are crafted using a special gel polish that is cured under a UV or LED lamp, providing a long-lasting, glossy finish. Unlike traditional polishes, gelicure nails can last up to two weeks without chipping. This makes them a favorite for those who want a low-maintenance yet stylish look.
Benefits of Gelicure Nails
- Long-Lasting Wear: Gelicure nails are known for their durability, staying chip-free for up to two weeks.
- Glossy Finish: The curing process ensures a high-shine finish that remains vibrant over time.
- Quick Drying Time: Thanks to the UV or LED curing, there's no need to wait for nails to dry.
- Strengthens Nails: The gel adds a protective layer that can help prevent breakage.
Common Misconceptions About Gelicure
- Harmful to Nails: Many believe gelicures damage nails, but with proper application and removal, they can be safe.
- Difficult to Apply at Home: While they require some specific tools, with practice, you can achieve salon-quality results at home.
- Only Available in Salons: With kits like WiRinef's Nail Art Kit, you can enjoy gelicure nails without leaving your house.
Gelicure nails offer a blend of beauty and practicality, making them a top choice for nail enthusiasts everywhere. Whether you're new to gel nails or a seasoned pro, understanding these basics can help you achieve stunning results every time.
Essential Tools and Products for Gelicure Nails

Must-Have Tools for Gelicure
Getting started with Gelicure nails at home? You'll need a few key tools to ensure a smooth application and long-lasting results:
- Nail File and Buffer: These are essential for shaping your nails and smoothing the nail surface before applying any polish.
- Cuticle Pusher and Nippers: Proper cuticle care is crucial for a neat finish. Push back those cuticles and trim any excess.
- Lint-Free Wipes: To clean your nails and remove any dust or oils, use lint-free wipes for a spotless base.
- UV or LED Lamp: This is non-negotiable for curing the gel polish. Make sure to choose a lamp suitable for your gel type.
Choosing the Right Gel Polish
Picking the perfect gel polish can make all the difference. Here are some tips:
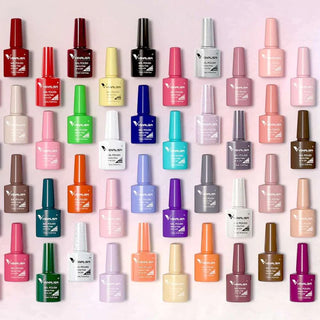
- Color Variety: Opt for sets like the Ultimate Gel Nail Polish Set which offers a range of vibrant colors.
- Long-Lasting Formula: Ensure the polish has a reputation for durability to avoid frequent touch-ups.
- Easy Application: Look for polishes with a good consistency that go on smoothly without streaking.
Importance of a UV or LED Lamp
Curing your gel polish is a critical step in the process. Here's why the right lamp matters:
- Efficiency: LED lamps cure faster than UV lamps, saving you time.
- Safety: LED lamps are generally considered safer for your skin compared to UV lamps.
- Compatibility: Ensure your lamp is compatible with the type of gel polish you’re using to get the best results.
Getting the right tools and products is half the battle when it comes to achieving salon-quality Gelicure nails at home. With the right setup, you'll be on your way to a flawless manicure that lasts.
Step-by-Step Guide to Applying Gelicure Nails at Home
Preparing Your Nails for Gelicure
Before you dive into the fun part, it's crucial to prep your nails properly. Start by trimming and filing your nails to your preferred shape, whether it's square, oval, or almond. A good shape sets the foundation for a stunning gelicure. Next, gently push back your cuticles using a cuticle stick and remove any dead skin. This not only makes your nails look neat but also helps the gel polish adhere better. Finally, buff each nail lightly to remove any shine; this ensures the gel sticks properly and doesn't peel off prematurely.
Applying the Base Coat
Once your nails are prepped, it's time to apply the base coat. This step is vital as it acts as the adhesive layer for the gel polish. Apply a thin layer of base coat, making sure to cover the entire nail surface evenly. Be cautious not to let it touch your skin, as this can cause lifting later. After applying, cure the base coat under a UV or LED lamp for the recommended time. This step locks in the base, ensuring your gelicure lasts longer.
Curing and Finishing Touches
After the base coat is set, apply your chosen gel polish color in thin, even layers. It's better to apply multiple thin layers rather than one thick one to avoid bubbling. Cure each layer under the lamp before applying the next. Once you have your desired color intensity, finish off with a top coat to seal the color and add shine. Cure the top coat as well, and wipe off any sticky residue with a lint-free wipe soaked in isopropyl alcohol.
After following these steps, you'll have salon-quality gelicure nails that you can flaunt with pride. Remember, practice makes perfect, so don't be discouraged if it takes a few tries to get it just right.
For vibrant colors that last, consider using VENALISA Nail Art's collection of soak-off gel polishes. Their products are perfect for both beginners and seasoned nail artists, offering a wide range of colors to express your creativity.
Tips for Long-Lasting Gelicure Nails
Avoiding Common Mistakes
Getting gelicure nails to last isn't just about applying them right, it's also about avoiding some easy-to-make mistakes. First off, never skip the base coat. This layer is crucial for the gel to adhere properly to your nails. Also, when applying the gel, make sure each layer is thin. Thick layers won't cure properly and can lead to bubbling or uneven texture. Always cap the free edge of your nail by running the brush over the tip—this seals the gel and helps prevent chipping. Finally, avoid getting gel on your skin or cuticles, as this can cause the polish to lift.
Proper Nail Care and Maintenance
Taking care of your nails post-gelicure is just as important as the application itself. Moisturize your nails and cuticles regularly using a nourishing oil or cream. This keeps them hydrated and prevents brittleness. If you notice any lifting or chipping, resist the urge to peel it off. Instead, gently file the edges to smooth them out. Also, try to wear gloves when doing chores like washing dishes to protect your nails from harsh detergents and water.
How to Prevent Chipping and Peeling
Preventing chipping and peeling starts with the right products. Invest in a long-lasting gel polish that offers durability and a professional finish. When applying, ensure your nails are clean and free of oils or lotions. Cure each layer thoroughly under a UV or LED lamp. If you find your gelicure is prone to peeling, it might be worth checking if your lamp is working efficiently, as improper curing is a common cause of peeling. A final tip—avoid using your nails as tools to open cans or scratch off labels, as this can quickly damage your gelicure.
Maintaining gelicure nails can be straightforward with the right approach. Focus on proper application, regular maintenance, and using quality products to keep your nails looking salon-fresh for weeks.
Safe Removal of Gelicure Nails

Tools Needed for Safe Removal
Removing gelicure nails requires a few essential tools to ensure you do it safely and effectively:
- Acetone: Pure acetone is crucial for breaking down the gel polish.
- Cotton Balls or Pads: These will be soaked in acetone and placed on the nails.
- Foil Wraps: To secure the acetone-soaked cotton on your nails.
- Nail File: Use a 180-grit file to gently buff the top layer of the gel.
- Cuticle Stick: For gently pushing off the gel once it's loosened.
- Cuticle Oil: To nourish your nails post-removal.
Step-by-Step Removal Process
- File the Top Layer: Start by gently filing the top coat of your gelicure nails. This helps the acetone penetrate the gel polish more effectively.
- Soak Cotton in Acetone: Saturate cotton balls or pads with acetone. Place one on each nail.
- Wrap with Foil: Secure the acetone-soaked cotton on your nails by wrapping each fingertip in foil. This traps heat and enhances the acetone's effectiveness.
- Wait: Allow your nails to soak for about 15-20 minutes. This gives the acetone time to break down the gel polish.
- Remove the Foil and Cotton: Gently remove the foil and cotton. The gel should appear lifted or bubbly.
- Push Off the Gel: Use a cuticle stick to carefully push the loosened gel off your nails. If the gel is stubborn, re-wrap and soak for a few more minutes.
- Wash and Moisturize: Once all the gel is removed, wash your hands thoroughly. Apply cuticle oil to rehydrate your nails and skin.
Post-Removal Nail Care
After removing gelicure nails, your nails might feel a bit dry or brittle. Moisturizing is key to restoring their health:
- Apply a generous amount of cuticle oil daily.
- Consider using a nail strengthener to help rebuild the nail's structure.
- Avoid applying new gel polish immediately to let your nails breathe and recover.
Taking care of your nails after gel removal is just as important as the application process. A little TLC goes a long way in maintaining healthy, strong nails.
Comparing Professional and At-Home Gelicure Nails
Pros and Cons of At-Home Gelicure
Doing your own gelicure at home can be a real money-saver, but it comes with its own set of challenges. The biggest advantage is cost savings—you can avoid those hefty salon prices, which can range from $30 to $50+ depending on where you live. Plus, you have the convenience of doing it whenever you want, without having to book an appointment.
However, the downside is that achieving salon-quality results requires practice and patience. You might end up with uneven layers or bubbles if you're not careful, and there's always the risk of damaging your nails if you don't follow the steps properly.
Cost Comparison
Here's a quick look at the cost differences:
| Aspect | Professional Gelicure | At-Home Gelicure |
|---|---|---|
| Initial Setup | $0 (included in service) | $50-$100 (for starter kit) |
| Per Session | $30-$50+ | $5-$10 (for gel polish) |
| Removal | $5-$15 | $0 (DIY removal) |
As you can see, the initial investment for an at-home setup might seem pricey, but over time, it can be more economical if you frequently do your nails.
Quality Differences
Professional gelicures are known for their flawless finish and longevity. Nail technicians have the skill and experience to apply the polish smoothly and evenly, ensuring a long-lasting result. They also have access to high-end tools and products that you might not find in a typical at-home kit.
On the other hand, at-home gelicures can still look great if you take your time and use quality products. It might take a few tries to perfect your technique, but many find it rewarding to achieve that salon-quality look on their own.
At-home gelicures offer flexibility and cost savings, but they require a bit of skill and practice to get right. With time and the right tools, you can enjoy beautiful nails without the salon price tag.
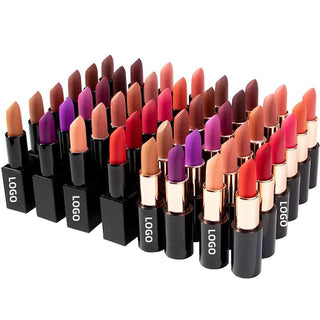
Whether you choose professional or at-home gelicures, both have their unique benefits. It's all about what works best for your lifestyle and budget. And while you're pampering your nails, consider treating yourself to stylish lip products that can complement your look.
Troubleshooting Common Gelicure Issues

Dealing with Lifting and Peeling
Gelicure nails can sometimes lift or peel, and it's often due to improper nail prep. Oily nail beds are the usual culprits. To tackle this, consider using a primer before your base coat. This helps remove oils that might interfere with the gel sticking properly. Also, check your daily habits. If you're always washing your hands or working with chemicals, try wearing gloves to protect your manicure.
Fixing Uneven Application
Uneven gel application can lead to a bumpy finish. The trick is to apply thin, even coats. If your gel is lumpy or wrinkly, it's probably too thick. Make sure each layer is cured before adding the next. Also, keep your hand steady and flat under the lamp to ensure even curing.
Addressing Nail Damage Concerns
Sometimes, gelicures can cause nail damage, especially if removed incorrectly. Always use an acetone remover and avoid peeling the gel off, as this can strip layers from your nails. After removal, hydrate your nails with cuticle oil to restore moisture. If you're concerned about damage, consider alternatives like Cashymart's press-on nails for a less invasive option.
If you're facing problems with your Gelicure, don't worry! Many people experience similar issues, and we have solutions for you. Check out our website for helpful tips and tricks to fix common Gelicure problems. Visit us today and get your nails looking great again!
Conclusion
So, there you have it! With a bit of practice and the right tools, you can totally nail that salon-quality gelicure at home. It's all about taking your time with each step, from prepping your nails to applying the polish just right. Don't forget to keep your nails healthy with regular breaks and some nourishing cuticle oil. Whether you're a newbie or a seasoned pro, at-home gelicures are a fun way to express yourself and keep your nails looking fab. Give it a go and enjoy the process!
Frequently Asked Questions
What are Gelicure nails?
Gelicure nails are a type of manicure that uses a special gel polish, which is cured under a UV or LED light to make it last longer and resist chipping.
How long do Gelicure nails last?
Gelicure nails usually last between 2 to 3 weeks without chipping or losing their shine, depending on how well you take care of them.
Do I need a UV or LED lamp for Gelicure nails?
Yes, a UV or LED lamp is necessary to cure the gel polish and ensure it sets properly and lasts longer.
Can I remove Gelicure nails at home?
Yes, you can remove Gelicure nails at home by soaking them in acetone and gently pushing off the polish. Just be sure to follow the steps carefully to avoid damaging your nails.
Are Gelicure nails safe for my natural nails?
Gelicure nails are generally safe if applied and removed properly. It's important to not peel them off, as this can damage your natural nails.
What should I do if my Gelicure nails start chipping?
If your Gelicure nails start chipping, you can file the edges gently and apply a top coat to extend their life. For severe chipping, it might be best to remove and reapply them.


