So, you've been eyeing those perfect gel nails and thinking, "Can I pull that off?" Absolutely, you can. Gel nails are not just a trend; they're a lifestyle choice for many who want their nails looking fab day in, day out. Whether you're a newbie or a seasoned pro, this guide is your go-to for everything about nails by gel. From the basics to keeping them fresh for weeks, we've got you covered. Dive into the world of gel manicures and see how they can transform your look with ease.
Key Takeaways
- Gel nails offer a long-lasting, glossy finish that beats regular polish any day.
- With the right tools, you can achieve salon-quality gel nails at home.
- Regular upkeep is key to making your gel manicure last without chips or peels.
- Creative designs and colors are endless with gel nails, letting you express your style.
- Choosing the right products and understanding safety can help maintain healthy nails.
Understanding the Basics of Gel Manicures

What Are Gel Nails?
Gel nails are a popular choice for those looking to achieve a durable and glossy manicure. Unlike regular nail polish, gel nails involve a special polish that is cured under a UV or LED light, resulting in a long-lasting finish that can withstand daily wear and tear. This curing process not only enhances the shine but also provides a protective layer over your natural nails, reducing the chance of chips and smudges.
Benefits of Choosing Gel Over Regular Polish
Choosing gel nails over traditional polish comes with several perks:
- Durability: Gel nails can last up to three weeks without chipping, making them perfect for those who don't have time for frequent touch-ups.
- Glossy Finish: The curing process ensures a high-shine finish that stays vibrant and doesn't dull over time.
- Versatility: Gel nails offer a wide range of colors and styles, from bold and bright to subtle and sophisticated.
Common Misconceptions About Gel Nails
There are a few myths floating around about gel nails that need clearing up:
- Damage to Natural Nails: Many believe gel nails damage your natural nails, but when applied and removed correctly, they can actually protect your nails.
- Difficult Removal Process: While it’s true that gel nails require soaking in acetone for removal, this process is straightforward and safe when done properly.
- Expensive Maintenance: While the initial cost might be higher than regular polish, the long-lasting nature of gel nails often makes them more cost-effective in the long run.
Pro Tip: To maintain healthy nails, always moisturize your hands and cuticles, especially after removing gel polish. This keeps your nails strong and prevents them from becoming brittle.
Step-by-Step Guide to Applying Gel Nails at Home
Essential Tools and Products Needed
Getting your nails ready for a gel manicure at home isn't just about polish. You need the right tools to make it all happen. Here's what you'll need to gather before you start:
- Nail file and buffer: These are essential for shaping your nails and getting rid of any shine.
- Cuticle pusher: Gently push those cuticles back to give your nails a clean edge.
- Nail cleanser or rubbing alcohol: This ensures your nails are free from oils and ready for gel application.
- Lint-free wipes: Because nobody wants fuzzies stuck in their polish.
- Gel base coat, color, and top coat: The trifecta of any gel manicure.
- UV or LED lamp: This is the magic that cures the gel polish.
- Cuticle oil: To keep your nails nourished and healthy.
Preparing Your Nails for Gel Application
Before applying any polish, you need to prep your nails properly. Start by removing any old polish. Shape your nails with a file and gently buff the surface to remove any shine. Push back your cuticles carefully. This step is crucial for giving your gel manicure a clean start.
Applying the Base, Color, and Top Coats
Here's where the fun begins! Start with a thin layer of gel base coat on each nail, avoiding the skin and cuticles. Cure under your UV or LED lamp as per the instructions—usually about 30 seconds for LED and 2 minutes for UV.
Next, apply a thin layer of your chosen gel polish color. Don't worry if it looks sheer at first; you'll need to cure it under the lamp and then apply a second coat for even coverage.
Finally, seal it all in with a thin layer of gel top coat. Cure one last time, and if there's any sticky residue, just wipe it off with a lint-free wipe and rubbing alcohol.
Remember, thin layers are key to preventing lifting and ensuring proper curing. Patience is important—let each layer cure fully before moving on to the next.
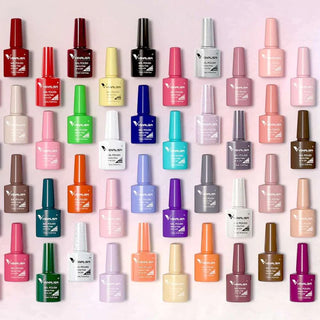
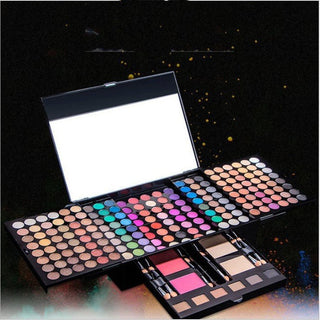
If you're looking to create stunning nail designs at home, consider investing in a UV Gel Nail Art Kit that includes everything you need for salon-quality results.
Maintaining Your Gel Manicure for Long-Lasting Results

Daily Care Tips for Gel Nails
Keeping your gel nails in top shape isn't just about the application—daily care is key to ensuring they last. Here’s a simple routine to follow:
- Moisturize Regularly: Use cuticle oil daily to keep your nails and surrounding skin hydrated. This prevents dryness and cracking, which can lead to lifting.
- Avoid Harsh Chemicals: When cleaning or doing chores, wear gloves. Chemicals in cleaning products can weaken the gel polish and cause it to chip.
- Be Gentle: Treat your nails with care. Avoid using them as tools to open cans or scratch surfaces, as this can cause them to break or chip.
Regular care can significantly extend the life of your gel manicure, keeping them looking fresh and glossy for weeks.
How to Avoid Chipping and Peeling
Chipping and peeling can be frustrating, but with a few precautions, you can keep your gel nails looking flawless:
- Apply Thin Layers: When applying gel polish, thin layers are less likely to peel. This also helps the polish cure properly under the lamp.
- Cap the Free Edge: Always brush the polish over the edge of your nail. This seals the polish and prevents chipping.
- Avoid Hot Water: Prolonged exposure to hot water can cause the gel to lift. Try to limit long hot showers or baths.
When and How to Safely Remove Gel Nails
Removing gel nails safely is crucial to avoid damaging your natural nails. Here’s how you can do it at home:
- File the Surface: Gently file the top layer of the gel to break the seal. This helps the remover penetrate better.
- Soak in Acetone: Soak cotton balls in acetone and place them on your nails. Wrap each finger in foil and let it sit for 10-15 minutes.
- Gently Push Off: Use a cuticle pusher to gently slide off the softened gel. If it resists, reapply acetone and wait a bit longer.
Remember, patience is key. Rushing the removal process can damage your nails, so take your time to do it right.
Exploring Creative Designs with Gel Nails
Trendy Gel Nail Art Ideas
Gel nails are like a blank canvas waiting for your creativity. With endless possibilities, you can experiment with bold colors, intricate patterns, or even minimalist designs. Consider these trendy ideas:
- Ombré Nails: Blend two or more colors for a smooth gradient effect. It's a stunning way to add depth and interest to your nails.
- Geometric Patterns: Use tape or stencils to create sharp, clean lines in various shapes. Think triangles, squares, or diamonds.
- Metallic Accents: Add a touch of glam with metallic stripes or dots. Gold and silver are classic choices that never go out of style.
Seasonal Inspirations for Gel Manicures
Gel nails offer the flexibility to change with the seasons, allowing your nails to reflect the time of year. Here are some seasonal inspirations:
- Spring and Summer: Embrace vibrant colors like pastels, floral patterns, or tropical designs to match the sunny vibes.
- Autumn: Go for warm tones such as burnt orange, deep reds, or rich browns. Add leaf motifs for a touch of nature.
- Winter: Opt for cool shades like icy blues, silvers, or classic reds. Snowflake designs or glittery finishes can add a festive touch.
How to Personalize Your Gel Nail Design
Personalizing your gel nail design is all about expressing your unique style. Here’s how you can make your nails truly yours:
- Choose a Signature Color: Pick a color that represents your personality or mood. It could be a bold red, a calming blue, or a playful pink.
- Incorporate Favorite Symbols: Whether it's stars, hearts, or initials, adding symbols can make your design special.
- Experiment with Textures: Try matte finishes, glossy tips, or textured polishes for a varied look.
Gel nails are not just about beauty; they’re a form of self-expression. With the right design, your nails can tell a story, reflect your mood, or even make a fashion statement. Don't be afraid to experiment and let your creativity shine.
Troubleshooting Common Gel Nail Issues
Dealing with Lifting and Bubbles
Lifting and bubbles can be a major headache when it comes to gel nails. These issues often arise due to improper nail preparation or application techniques. To prevent lifting, make sure your nails are thoroughly cleaned and free of oils before applying the gel. Use a nail cleanser or rubbing alcohol to wipe down your nails. When applying the gel, thin layers are crucial. Thick layers can trap air, leading to bubbles. Also, ensure you cap the free edge of your nail with each coat to seal it properly.
Fixing Smudges and Imperfections
Smudges and imperfections can occur if the gel isn't cured properly or if you accidentally touch the nail before it's fully set. To fix smudges, gently buff the affected area and reapply the gel polish, then cure it under the lamp. For imperfections, a steady hand and patience are key. Apply the polish slowly and steadily, and if mistakes happen, a quick clean-up with a brush dipped in acetone can save the day.
Preventing Allergic Reactions to Gel Products
Allergic reactions to gel products can be concerning. Symptoms might include redness, itching, or swelling around the nails. To minimize risks, choose high-quality, hypoallergenic products and always perform a patch test before full application. If you experience any adverse reactions, it's best to discontinue use immediately and consult a dermatologist. Remember, not all products are created equal, so opting for reputable brands can make a difference in your nail health. Consider trying JTING UV Gel Nail Polish for a safe and vibrant nail experience.
Choosing the Right Gel Products for Your Needs

Understanding Different Types of Gel Polishes
Choosing the right gel polish can be like picking the perfect outfit for a big day. Gel polishes come in different types, each with its own perks. You've got the standard gel polish, which is great for its classic look and feel. Then there's builder gel, which is thicker and perfect if you want to add some length or strength to your nails. Lastly, there's the hybrid gel, which combines the best of gel and traditional polish, offering a more flexible finish. When you're picking, think about what you need—do you want durability, flexibility, or maybe a bit of both?
Top Brands for Gel Nail Products
When it comes to brands, the market is flooded with options, but some stand out. Here’s a quick rundown:
- CND Shellac: Known for its long-lasting formula and ease of removal.
- Gelish: Offers a wide variety of colors and is favored for its high-shine finish.
- OPI GelColor: Popular for its vibrant shades and reliable wear.
These brands have been tried and tested, and they’re pretty much the go-tos for nail enthusiasts. If you're looking to try something new, the WiRinef Nail Art Kit is a fantastic option. It’s designed for both pros and beginners, offering premium UV/LED color gel polishes.
How to Select the Best UV or LED Lamp
Picking the right lamp is crucial for a successful gel manicure. Here’s what to consider:
- Type of Lamp: Decide between UV or LED. LED lamps cure faster and are often more energy-efficient, while UV lamps can cure all types of gel polish.
- Wattage: Higher wattage usually means faster curing. Aim for at least 36 watts for effective results.
- Size and Portability: If you travel a lot, a compact, portable lamp might be best. But for home use, a larger lamp that fits all five fingers at once can save you time.
Picking the right products is like setting the foundation for your nail art. With the right tools, your gel manicure can look salon-perfect every time.
The Health Aspects of Using Gel Nails

Are Gel Nails Safe for Everyone?
Gel nails have taken the beauty world by storm, but are they safe for everyone? The truth is, while gel manicures offer a stunning finish, they may not be suitable for everyone. Some people might experience allergic reactions to the chemicals in gel products. It's crucial to do a patch test if you're trying a new brand or formula. If you notice redness, itching, or discomfort, it might be best to explore other nail options, like press-on nail enhancements, which are gentle and easy to use.
Tips for Keeping Your Natural Nails Healthy
Maintaining healthy natural nails while enjoying gel manicures is possible with some simple habits:
- Moisturize Regularly: Keep your nails and cuticles hydrated with oils or creams.
- Limit Exposure: Give your nails a break between gel applications to avoid weakening them.
- Use Nail Strengtheners: Apply a nail hardener to protect your natural nails.
Taking care of your nails is more than just about aesthetics; it's about keeping them strong and healthy.
Understanding the Risks of UV Exposure
One concern with gel nails is the exposure to UV light during the curing process. While the risk is relatively low, it's wise to take precautions. Use a broad-spectrum sunscreen on your hands before your manicure, or consider using an LED lamp, which emits less UV radiation. Always follow the manufacturer's guidelines to minimize any potential risks.
Using gel nails can be fun and stylish, but it's important to know how they affect your health. While they can make your nails look great, they may also cause some issues like nail damage or allergic reactions. If you're curious about how to keep your nails healthy while enjoying gel nails, visit our website for tips and products that can help!
Conclusion
So, there you have it! Gel nails are more than just a trend; they're a fantastic way to keep your nails looking fresh and fabulous. Whether you're a newbie or a seasoned pro, gel manicures offer a perfect mix of style and durability. They let you express yourself with endless color options and designs while ensuring your nails stay strong and healthy. Plus, with a bit of practice, you can even master the art of doing them at home. So why not give it a shot? Your nails will thank you for the extra love and attention. Happy polishing!
Frequently Asked Questions
What makes gel nails different from regular polish?
Gel nails use a special polish that hardens under UV or LED light, making them last longer and resist chipping compared to regular polish.
How can I remove gel nails safely at home?
To remove gel nails safely, soak a cotton ball in acetone, place it on your nail, and wrap it with foil. Let it sit for 10-15 minutes, then gently push off the gel with a cuticle stick.
Are gel nails safe for everyone to use?
Most people can safely use gel nails, but it's important to follow the instructions and take breaks between applications to keep your natural nails healthy.
What should I do if my gel nails start to lift?
If your gel nails start to lift, avoid peeling them off. Instead, gently file the lifted edge and apply a small amount of nail glue to secure it.
Can I do gel nails myself, or do I need to go to a salon?
You can definitely do gel nails at home with the right tools and a bit of practice. Just make sure to follow each step carefully for the best results.
How can I make my gel nails last longer?
To make your gel nails last longer, avoid using your nails as tools, apply cuticle oil regularly, and wear gloves when doing household chores.


